
Nearly 80% of clicks and hisses on a turntable come from dirt tucked in grooves, not permanent damage. That surprised me the first time I tested a neglected LP against a brushed one.
I write from my living room where I spin dozens of vinyl and care for a modest collection. Dust forces the needle to work harder, and that cuts the quality of music and shortens gear life.
In this guide I explain the tools I grab, what I skip, and my step-by-step routine. I focus on safe, repeatable cleaning that gives clearer sound and protects both the record and the player over time.
My approach is practical and immediate. Follow along and you’ll hear why a few minutes of regular care improves playback and extends the life of your vinyl records.
Key Takeaways
- Simple maintenance prevents noise and protects your gear.
- Routine care yields a noticeably better listening experience.
- I share exact tools and steps you can use at home.
- Gentle methods beat rare, aggressive fixes.
- Both entry-level and high-end players benefit from clean vinyl.
Before I start: tools, solutions, and safety for cleaning vinyl records
Before any scrubbing, I gather a compact kit I trust for everyday vinyl care.
My essential kit is simple: a carbon fiber brush for daily dry work, a few lint-free microfiber cloths for drying, distilled water for mixes, and a purpose-made cleaning solution that won’t harm the surface.
I keep a stylus brush in the same pouch. A quick pass on the stylus stops dust from moving back onto the grooves and protects tracking.how-to-clean-a-mousepad
What I never use
No bleach, no Windex, and no undiluted rubbing alcohol. I also skip tap water because minerals and impurities can leave deposits that attract dirt.
When I pick a machine
If a vinyl record is heavily grimy or my stack grows, I choose a record washer or a dedicated machine. They save time and reach deeper than manual methods on stubborn spots.
- Starter kits I recommend: Vinyl Buddy (about $19.99) and GrooveWasher Walnut (around $44.95).
- When I make a mild mix, Simple Green at 1:30 with distilled water keeps labels safe and the finish intact.
| Kit | Includes | Price (approx.) |
|---|---|---|
| Vinyl Buddy | Velvet brush, microfiber, stylus brush, solution, pouch | $19.99 |
| GrooveWasher Walnut | G2 Fluid Mist, replaceable pad | $44.95 |
| Basic kit | Carbon fiber brush, microfiber cloth, distilled water | $15–$25 |
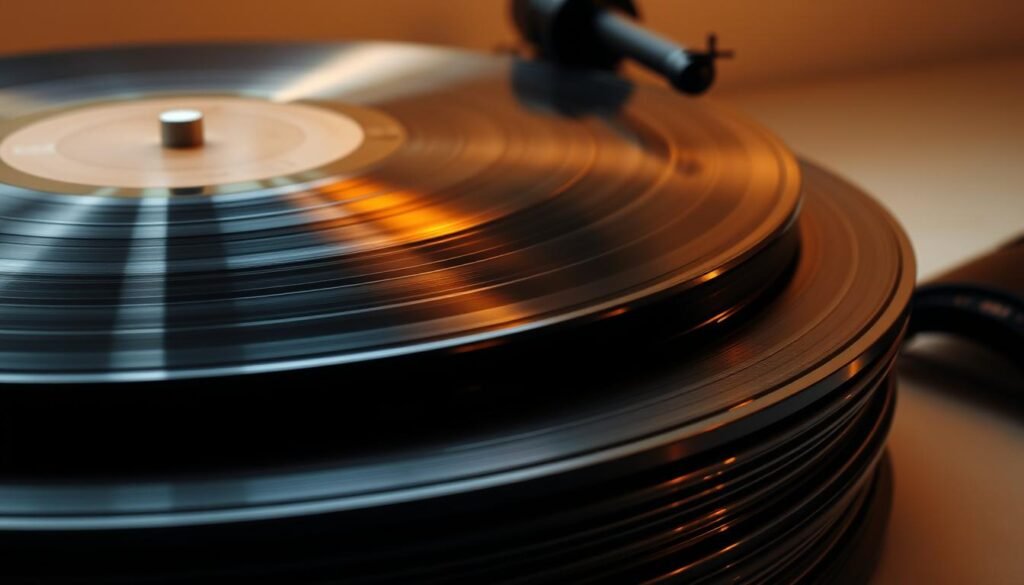
How to clean records step by step for better sound quality

I start every session by inspecting the vinyl under a bright lamp for dust and visible grime. This quick check tells me whether a dry pass will do or if a wet approach is needed.
Dry prep
Use a carbon fiber brush and hold the disc steady. I sweep lightly along the grooves to lift dust and reduce static before any liquid touches the surface.
I look for stubborn dirt or fingerprints that might need extra attention later. A careful dry pass prevents pushing debris deeper into the groove and protects sound quality.how-to-clean-a-mouse-pad
Wet clean
For wet work I mix distilled water with a vinyl-safe cleaning solution. I never pour directly on the label; instead I apply the solution to a brush or a cloth.
I move in a controlled circular motion that follows the grooves, rotating the vinyl slowly so the solution covers the playing area evenly. Pressure stays light—let the solution do the work.
Dry down and check
After rinsing with distilled water, I blot gently with a clean microfiber cloth and then air-dry the disc fully. No tap water—minerals leave residue.
Only when the surface is bone dry do I return the vinyl record to a sleeve. I finish by giving the stylus a quick brush so my freshly treated discs don’t re-contaminate the player.
- Quick tip: If you want a deeper reference, I sometimes follow this routine with an in-depth guide from Martha Stewart for technique comparison: record care tips.
Going deeper: record washers, ultrasonic cleaners, and smart care to protect my vinyl collection

When I dive into heavier maintenance, I pick the method that matches the record’s condition and my budget.how-to-clean-cast-iron-skillet
Record washer vs ultrasonic vs manual: I use manual methods for a few dirty vinyl and quick dust checks. A record washer kit gives consistent agitation and is my choice when a stack needs work. Ultrasonic machines use cavitation and are best for deep restorations, though they cost more.
Soap-and-water rules: If I mix in mild, additive-free soap or baby shampoo, I apply it with a soft brush or microfiber cloth, rinse with distilled water, and air-dry fully. I never use tap water or let moisture hit the label. Never play a wet record.
Preventive care: I store vinyl vertically in sturdy storage, use anti-static sleeves, control humidity, and handle discs by the edges. A quick brush and a clean cloth before play keeps dust out of grooves and improves sound and the music experience.how-to-clean-cast-iron
- My takeaway: Manual for routine care, a record washer for efficiency, ultrasonic for deep restorations.
Conclusion
I finish sessions knowing a little care today saves time and gear later.
Stick to a simple routine: start dry with a carbon fiber brush, use a vinyl-safe solution and distilled water for wet passes, keep liquids away from the label, then dry with a clean microfiber cloth and air completely.
Small habits—light dusting before play and handling by the edges—keep grooves cleaner and cut down on deeper cleaning needs.
Skip harsh chemicals, avoid tap water, and never play a wet record. Proper care improves sound quality, reduces wear on the stylus and tonearm, and extends the life of your record player and collection.
Clean vinyl and tidy storage turn every spin into a richer music experience.


