
Surprising fact: many phones hold 5–20 gigabytes in the category labeled system data, and for some users it can surge to 30–60% of total capacity.
I ran into this myself when my phone slowed and the storage bar showed an alarming slice of used space. That hidden bundle of caches, logs, and other resources quietly eats space and can trigger repeat issues with performance and updates.
I’ll walk you through a practical, step-by-step approach I use: quick browser and app cache cleanups, trimming messages and large files, a date-change cache trick, and, when needed, the nuclear option of a factory reset with an encrypted backup.
My promise: exact menu paths, timing notes, and simple checks so you can reclaim free storage safely and keep at least 10–15 GB of headroom for smoother operation.
Key Takeaways
- I define what system data means and why it can balloon in plain English.
- There’s no single button to erase that category, but a sequence of steps works fast.
- Start with quick cache and app fixes, then use deeper methods if needed.
- Keeping 10–15 GB free improves performance and reduces storage alerts.
- I’ll show checks in Settings and via Finder so you can confirm results.
Why I Care About iPhone System Data Right Now
I started paying attention when installs and recordings stalled and my device warned that storage was almost full. That sudden failure showed how quietly system data can climb from a few gigabytes into double digits.
Streaming, social media, and long message threads pile caches and attachments behind the scenes. iOS shows a colored bar in Settings, but it won’t give exact numbers per category. That lack of clarity means I check iphone storage again on my Mac for a clearer view.
When the size crosses about 20 gigabytes, I notice real impacts: slower installs, stalled updates, and camera pauses. These are not always user mistakes; they are recurring iOS issues across devices and versions.
- I was hit by an alert while trying to shoot a video—that triggered this whole cleanup.
- My goal is simple: reclaim space safely and keep at least 10–15 GB free.
- I measure results after each step so I know what actually reduced the system data burden.
What iPhone System Data Includes and Why It Bloats

One day my free gigabytes dropped fast and I had no big downloads to blame. That mystery usually points at hidden system data made of caches, logs, and other resources iOS keeps ready in the background.
Caches store pages, images, scripts and cookies from web browsing and apps. They speed up loading, but those files pile up as I stream and scroll.
Logs and temporary files collect when apps crash or when the OS records diagnostic info. Over weeks this adds measurable size, sometimes into multiple gigabytes.how-to-clean-a-couch
Culprits that snowball storage
- Messages threads keep videos, GIFs, and voice clips inside chats even when not saved elsewhere.
- Social apps hold drafts, thumbnails, and auto-saved media during heavy usage.
- Browser caches from Safari or Chrome store high-res assets that linger longer than expected.
“Apple defines this category as caches, logs, and other resources in use by the system.”
If iphone system data grows past about 20 gigabytes, I treat that as bloat. It cuts available storage for updates, backups, and new photos. iOS tries to expire caches, but it does not always purge aggressively, so trimming excess makes performance more reliable.
Quick fixes I use to free storage fast

I start with quick moves that often free several gigabytes in under ten minutes. These are safe, noninvasive steps that target common culprits and restore usable space fast.
Clear Safari history and website data
I go to Settings > Safari > Clear History and Website Data, pick a timeframe, and confirm. A few weeks of browsing can add up and trimming this can show an immediate drop in the system data bar.how-to-clean-mattress
Trim Messages and large chat attachments
In Settings > Messages I set Keep Messages to 1 Year or 30 Days and then review big attachments via Settings > General > iPhone Storage > Messages. Removing old media reclaims notable storage space.
Restart to purge temporary files and background caches
I restart the device to flush temporary files and background caches that the OS can safely discard. This often nudges storage back down without further action.
Update iOS to squash cache and logging bugs
Finally, I check for updates. New builds often fix runaway logs and stubborn cache behavior. I keep the phone plugged in and on Wi‑Fi while installing.
- I also check Chrome and other apps since each app keeps its own cache.
- After each quick fix I review iPhone Storage and measure the change.
Step-by-step: how to clear system data on iphone

I began by noting the light gray bar in Storage, then worked down a list of practical steps. That baseline helps me see which change made the biggest impact.how-to-clean-suede-trainers
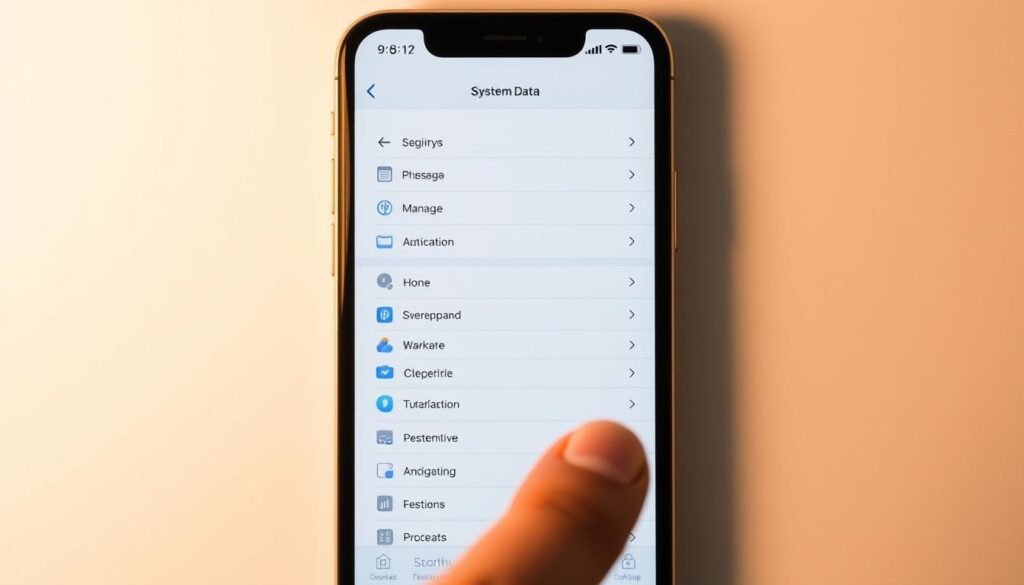
Check storage and read the bar
Open Settings > General > iPhone Storage and note the light gray slice labeled System Data. I write the number down so I can compare after each step.
Manually remove browser files
For Safari I go to Settings > Safari > Clear History and Website Data and pick what I need. For Chrome I open the app, tap ⋯ > History > Clear Browsing Data and include cached images/files and cookies.
Offload or delete large apps
I scan the list sorted by size at Settings > General > iPhone Storage, then offload or delete any space‑hogging app. Reinstalling fresh often drops old caches and in‑app files.
Trim Messages and big media
In Settings > Messages I switch Keep Messages to 1 Year or 30 Days. Then I remove large attachments via iPhone Storage > Messages to reclaim files and videos.
The date‑change trick and ProRes prompt
I use the date trick when caches won’t budge: Airplane Mode on, Wi‑Fi and Bluetooth off, force‑quit apps, Settings > General > Date & Time, turn off Set Automatically, jump the date one year ahead, wait 60 seconds on the Home screen, check storage, then set three months ahead, wait again, and finally restore automatic date and networks.
On Pro models I enable Settings > Camera > Formats > Apple ProRes, select ProRes in Video, then watch for a “Freeing Resources” message. That prompt can force the OS to purge leftover resources.
“I move one step at a time and recheck storage after each action so I know what actually worked.”
- I check the storage number after every step.
- If a single app keeps re‑bloating the storage, I delete it and reinstall as a last resort.
- For community tips and edge cases, see this Apple discussion about storage.
Advanced options when storage issues persist
 interface. The screen shows a detailed breakdown of storage usage, with graphical representations of different file types and data categories occupying the foreground. The background features a blurred, out-of-focus backdrop of circuit boards and electronic components, evoking a sense of technical sophistication. Warm, vibrant lighting casts a soft glow over the scene, creating a sleek, futuristic aesthetic. The overall composition emphasizes the complexity and importance of managing system data on a mobile device.")
After quick fixes gave little relief, I prepared a short list of stronger steps.
Reset Network Settings can fix odd syncs and minimal cache problems. I open Settings > General > Transfer or Reset iPhone > Reset > Reset Network Settings and confirm. This clears saved Wi‑Fi and VPN entries but leaves personal files intact.how-to-clean-a-humidifier
Reset All Settings wipes preferences back to defaults without erasing photos or messages. I use the same Transfer or Reset iPhone path and pick Reset All Settings. That often stops quirky behavior tied to corrupted preferences.
Full factory reset: Erase All Content and Settings
When nothing else works I treat Erase All Content and Settings as the final option. Path: Settings > General > Transfer or Reset iPhone > Erase All Content and Settings. This removes orphaned logs and stubborn system data bloat.
Restore from encrypted backup and 2FA precautions
I always back up with Finder or iTunes and check Encrypt local backup so Health and passwords survive the restore. I export recovery codes for authenticator apps before erasing.
| Option | Effect | Risk / Notes |
|---|---|---|
| Reset Network Settings | Fixes connectivity and minor cache syncs | Will drop Wi‑Fi and VPN entries |
| Reset All Settings | Reverts preferences; keeps personal files | Requires reentering some passwords |
| Erase All Content and Settings | Full wipe; removes deep logs and corruption | Backup first; restore may take hours |
“I plan several hours, keep the device plugged in, and verify my backup before I erase.”
- I only escalate when prior steps fail.
- I verify the backup is complete before a factory reset.
- Restore times vary with backup size and network speed.
How I verify results and track storage over time
I re-open Settings > General > iPhone Storage after each action and watch the light gray system data bar for movement. That quick check tells me whether a recent step actually changed the size of hidden files.
If the graph seems frozen, I wait a minute or relaunch Settings. The on-device view can lag, so patience prevents false conclusions. I note the number before and after each action.
For clarity I connect the device to a Mac and open Finder or iTunes. The desktop storage bar often shows categories more clearly than the phone. This second check helps me confirm changes in system data and other categories.
What I track
- I record before-and-after iphone storage numbers so I know which steps saved the most space.
- I watch whether specific apps re-inflate caches or if trimmed files stick removed.
- I recheck Messages and browser caches after heavy browsing.
- I keep a simple log and aim for 10–15 GB free as a safety way to keep performance steady.
“Recheck, record, and repeat — that routine shows what truly makes a difference.”
Keep System Data low with smart habits

I keep a small routine that prevents storage surprises before they happen. Small habits add up and give the device room to manage caches and temporary files without fuss.how-to-clean-quartz-countertops
Maintain 10–15 GB free space as headroom
I aim for 10–15 GB of free storage so iOS has breathing room for caches, logs, and updates. That headroom improves overall performance and reduces the chance of stalled installs.
Enable Offload Unused Apps and optimize Photos storage
I turn on Offload Unused Apps in Settings > App Store > Offload Unused Apps. This removes rarely used apps but keeps their documents and data, so reinstalling is painless.
I also enable iCloud Photos and pick Optimize iPhone Storage so full‑resolution originals live in iCloud while smaller local copies save space.
Do a monthly audit of heavy apps and caches
I check top storage apps once a month and remove or reset any that balloon with cached files. Social feeds like Instagram and TikTok can grow into gigabytes fast.
- I periodically clear browser caches to prevent silent bloat.
- I limit background refresh and location for apps that don’t need them.
- I keep iOS updated so fixes for logging and storage behavior arrive promptly.
| Habit | Where in settings | Benefit |
|---|---|---|
| Maintain headroom | Settings > General > iPhone Storage | Better performance and fewer failed updates |
| Offload unused apps | Settings > App Store > Offload Unused Apps | Frees space while keeping app data |
| Optimize Photos | Photos > iCloud Photos > Optimize iPhone Storage | Saves local space; originals in iCloud |
My way is simple: steady maintenance beats frantic cleanups. For an organized plan and some extra tips, I also follow a short guide on smart storage habits.
Common reasons your iPhone storage fills up
![]()
Storage can creep up slowly when background tasks and app caches pile up unseen. I watch several recurring causes that explain sudden growth in system data and used space.
Temporary files and logs build up when iOS does not purge aggressively. Crash reports, diagnostic logs, and leftover temp files can add gigabytes over weeks.
Browsing and streaming caches are stealthy culprits. Safari, Chrome, and video apps store high‑res assets that linger and inflate the storage footprint.
- I flag buggy apps and memory leaks that keep caching and never expire old files.
- Outdated iOS builds can log excessively and fail to trim stale caches after updates.
- Local iCloud files, downloads, and media hoarding—especially long message threads with GIFs and videos—duplicate content and swell usage.
- Background refresh and preloading let caches grow quietly while the device is idle.
“I use this checklist as a diagnostic step before I consider a factory reset; sometimes a clean slate is the only fix.”
If growth persists despite fixes, a factory reset often removes orphaned logs and cache debris. I run this checklist first so I know what steps worked and which apps caused the largest change.
For an extra reference on managing storage, see this storage guide.
Safety, backups, and time estimates I plan for
Before any wipe, I make sure backups and recovery paths are locked down. That gives me confidence when I choose heavier steps like a factory reset.
Encrypt local backups by connecting my device to a Mac, opening Finder or iTunes, and creating a fresh encrypted backup. I confirm Encrypt local backup so Health, passwords, and keychain items stay intact.
Export recovery codes for authenticator apps
I export or securely store recovery codes for any 2FA apps. Losing access can turn a restore into a big hassle. This small step saves time and stress.
Restore times and planning
Restore time varies with backup size, network speed, and cloud features. Small backups may finish under an hour. Large libraries and videos can stretch a restore into several hours.
- I keep the phone plugged in and on Wi‑Fi during a restore.
- I document key settings so I can rebuild preferences if I reset all settings or erase content.
- I verify the backup date and integrity before I proceed with any risky step.
“I only move forward once my encrypted backup and 2FA recovery are confirmed.”
| Action | Why it matters | Estimate |
|---|---|---|
| Create encrypted backup (Finder/iTunes) | Preserves Health, passwords, and keychain | 10–30 minutes (depends on size) |
| Export 2FA recovery codes | Ensures sign‑in access after restore | 5–15 minutes |
| Erase All Content and Settings | Removes deep logs and leftover files | 20 minutes for erase; restore varies |
| Restore from backup | Returns apps, settings, and media | Under 1 hour to several hours |
My rule: treat safety as part of the process, not an add‑on. I only proceed with a factory reset when my backup and recovery steps are complete.
Conclusion
The takeaway is a practical checklist that keeps my device fast and my storage lean.
I recap the plan: quick fixes first, then the step‑by‑step cleanup, and advanced options when needed. I always verify results in settings so I know which action moved the system data needle.
Long‑term habits matter: keep headroom, offload unused apps, and optimize Photos. That approach stops most junk from returning and improves overall performance.
If nothing else works, a verified encrypted backup and a factory reset is the final way to remove stubborn logs and reclaim serious space.
For an extra reference and tips I follow this system storage guide. With these steps, I’m back in control of my iphone storage and daily use.


