
Did you know a dirty ice maker can harbor bacteria and contaminants? This affects the quality of the ice it produces. Cleaning your ice maker is key to keep it running well and hygienic. It makes sure the ice is clean and safe, and it also extends the appliance’s life.
To get the best results, clean your ice maker every 9 months. If you live in an area with hard water or high humidity, you might need to do it more often. You can find detailed steps and tips on how to effectively clean an ice to keep it running smoothly.
Key Takeaways
- Regular cleaning maintains ice quality and appliance longevity.
- Clean every 9 months, or more often in certain conditions.
- Use appropriate cleaning supplies like Affresh® ice machine cleaner.
- Steps include turning off the machine, cleaning removable parts, and running cleaning cycles.
- Proper maintenance ensures safe and clean ice production.
Understanding Your Ice Maker System
https://www.youtube.com/watch?v=KvLcEqUvO0o
Before we start cleaning, let’s look at the different ice makers and their parts. Knowing your ice maker’s system is key for good maintenance and top performance.
Types of Ice Makers
Ice makers vary to meet different needs and places. The main types are:
- Portable Ice Makers: These are small and versatile, ideal for small events or offices.
- Built-in Ice Makers: These are part of your fridge or freezer, offering convenience and style.
- Countertop Ice Makers: These sit on your counter, easy to set up and always ready for ice.
Each type has its own special features and advantages. Portable ice makers are perfect for outdoor events or small kitchens. Built-in models, on the other hand, are a permanent solution.
Key Components to Know
To clean and keep your ice maker in top shape, you need to know its main parts. These include:
- The Evaporator: This is where ice is made. Keeping it clean is important for good ice quality.
- Condenser Coils: These coils help cool the ice maker and are key for its efficiency.
- The Drain: It’s important to clean the drain often to avoid water and bacteria buildup.
Knowing these parts helps you do regular upkeep and fix any issues.
Why Regular Cleaning is Important

Cleaning your ice maker regularly is key to keeping it working well. It also helps keep everyone who uses it healthy. A dirty ice maker can have bacteria, mold, and other bad stuff. This can make your ice taste bad and even hurt your health.
Health Considerations
Not cleaning your ice maker often can lead to a buildup of harmful germs. These can include:
- Mold and Mildew: Seeing mold or mildew means your ice maker needs cleaning right away.
- Bacteria: Some bacteria can make you sick. They in ice are a big problem for people with weak immune systems.
- Other Contaminants: Dust, dirt, and other stuff can also get inside. This can make your ice not as good.
Regular cleaning gets rid of these dangers. It makes sure the ice you make is safe to drink.
Performance Benefits
Regular cleaning of your ice maker also boosts its performance:
- Improved Ice Quality: Clean ice makers make clearer, tastier ice.
- Reduced Energy Consumption: A clean ice maker uses less energy. This can lower your bills.
- Prolonged Appliance Lifespan: Keeping it clean helps your ice maker last longer. It stops debris from causing problems.
Adding regular cleaning to your routine brings these benefits. It keeps your home safe and healthy.
How Often Should You Clean Your Ice Maker?

Knowing when to clean your ice maker is key to its performance and ice quality. The cleaning frequency depends on usage and environment.
General Guidelines
I suggest cleaning your ice maker every 3 to 6 months. But, this can change based on how much you use it. For example, daily use or a busy area might mean more frequent cleaning.
Usage-Based Cleaning Schedule:
| Usage Level | Recommended Cleaning Frequency |
|---|---|
| Low (Occasional Use) | Every 6 months |
| Moderate (Regular Use) | Every 3 months |
| High (Daily or Heavy Use) | Every 1 to 2 months |
Signs That It Needs Cleaning
It’s not just about a schedule; sometimes, you need to listen to your ice maker. Here are signs it’s time for a clean:
- Unusual odors or tastes in the ice
- Reduced ice production or slower ice making
- Visible mold or mineral buildup
- Ice cubes that are cloudy or irregularly shaped
Regular cleaning boosts ice taste and quality. It also keeps your ice maker efficient and long-lasting.
Preparing for the Cleaning Process

Getting your ice maker ready for cleaning is key to a successful and safe process. Before you start cleaning, it’s important to know what steps to take. This makes the task easier and more effective.
Gather Your Supplies
To clean your ice maker well, you’ll need a few basic items. You’ll need a soft cloth or sponge, some mild detergent, and a descaling solution. The descaling solution is vital for getting rid of mineral deposits. These deposits can change the taste of your ice and how well your ice maker works.how-to-clean-humidifier
- A soft cloth or sponge for wiping down surfaces
- Mild detergent for cleaning exterior parts
- A descaling solution to remove mineral buildup
Tip: Always check your ice maker’s manual for recommended cleaning supplies. This helps avoid damaging the appliance.
Safety Precautions
Before you begin cleaning, make sure you’re safe. First, unplug your ice maker to avoid any accidental start-ups or electrical shocks. It’s also a good idea to wear protective gloves. This protects your hands from harsh cleaning agents and sharp edges.
“Safety is not just a precaution, it’s a necessity when working with electrical appliances and cleaning agents.”
By following these simple safety steps, you can ensure a safe and effective cleaning process.
Step-by-Step Cleaning Procedure
In this section, I’ll guide you through cleaning your ice maker step by step. Cleaning it regularly keeps it working well and ice quality high.
Emptying the Ice Maker
First, empty the ice maker completely. Remove ice from the bin and throw it away. Then, unplug the ice maker for safety. Unplugging is key to avoid accidents or shocks.
- Remove all ice from the ice bin.
- Dispose of the ice to prevent any contaminated ice from being used.
- Unplug the ice maker.
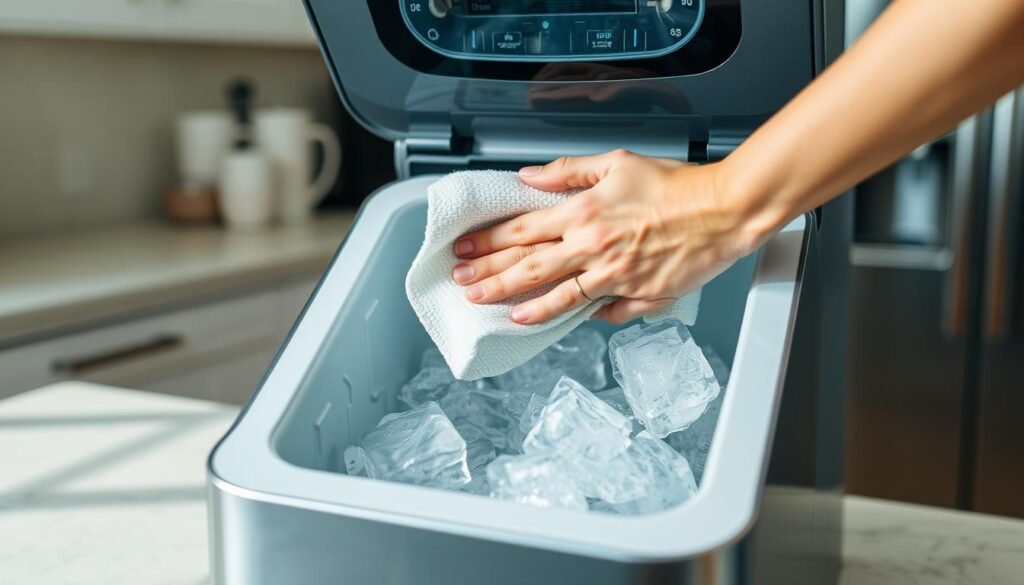
Cleaning the Exterior
After emptying and unplugging, clean the outside. Use a soft, damp cloth with warm soapy water. Be gentle to avoid scratches.
- Dampen a soft cloth with warm soapy water.
- Wipe down the exterior surfaces gently.
- Dry the surfaces with a clean, dry cloth to prevent water spots.
Cleaning the Interior Components
Cleaning the inside parts is vital for your ice maker’s performance. You’ll need to clean the evaporator and condenser coils and other parts. Use a mix of water and mild detergent.
Here’s a simple guide to cleaning the interior:
| Component | Cleaning Method |
|---|---|
| Evaporator Coils | Use a soft brush and a mixture of water and mild detergent. |
| Condenser Coils | Vacuum or brush gently to remove dust and debris. |
| Interior Surfaces | Wipe down with a damp cloth and dry thoroughly. |
“Regular cleaning of your ice maker’s interior components can significantly improve its efficiency and prolong its lifespan.”
By following these steps, you’ll keep your ice maker in great shape. It will continue to make clean, fresh ice. Remember, regular maintenance is key to optimal performance.
Descaling Your Ice Maker

Descaling your ice maker is key to keeping it working well. Over time, minerals from water can clog it, making it less efficient. Experts say regular maintenance, like descaling, keeps your ice maker in top shape.how-to-draw-a-flower
Choosing the Right Descaler
Choosing the right descaling solution is crucial. There are many products out there, so pick one that fits your ice maker. Look for a descaler made for ice makers or similar appliances. Some good options include:
- Products with citric acid, which are gentle but effective.
- Descalers made to remove minerals without harming your ice maker.
Always read the manufacturer’s instructions before buying a descaler. This ensures it’s right for your ice maker model.
Step-by-Step Descaling Instructions
Descaling your ice maker is easy if you follow the right steps. Here’s a simple guide to help you:
- First, turn off and unplug your ice maker for safety.
- Then, mix the descaling solution as the product says. This usually means water and descaler in a certain ratio.
- Next, pour the solution into the ice maker’s water reservoir. You might need to remove a panel to get to it.
- Let the solution go through the ice maker. You might need to turn it on briefly or let it sit, depending on the instructions.
- After that, rinse the ice maker well with clean water. Do this a few times to get rid of all the solution and minerals.
It’s important to follow the descaling product’s instructions and be careful to avoid accidents or damage.
Regular descaling not only boosts your ice maker’s performance but also makes it last longer. Remember, a well-maintained appliance is a happy one.
Deep Cleaning vs. Surface Cleaning
Keeping your ice maker clean is more than just wiping it down. You need to know the difference between deep cleaning and surface cleaning. Both are key to keeping your appliance working well and lasting long.
Deep cleaning gets into the heart of your ice maker, clearing out any buildup or residue. This affects how well it works. Surface cleaning, on the other hand, focuses on the outside and parts you can easily reach. It keeps your ice maker looking good and stops bacteria and mold from spreading.how-to-draw-a-face
When to Deep Clean
Deep clean your ice maker every 3 to 6 months, depending on how much you use it. For a full guide on deep cleaning, check out this resource. If your ice maker is making less ice, tastes odd, or has visible buildup, it’s time for a deep clean.
Regular deep cleaning makes your ice taste better and keeps your machine running efficiently. It also helps your ice maker last longer.
Tips for Surface Cleaning
Surface cleaning is easier and can be done more often. Begin by wiping the outside with a mild detergent and warm water. Use a soft cloth to avoid scratching.
- Focus on the ice dispenser and any parts that touch hands or utensils.
- For stubborn stains or grime, try a baking soda and water mix.
- Regular surface cleaning keeps your ice maker looking great and stops bacteria and mold.
Knowing when to deep clean and how to surface clean keeps your ice maker working right. It will keep making clean, fresh ice for you.
Troubleshooting Common Ice Maker Issues
When your ice maker stops working right, it can be really annoying. But knowing what might be wrong is the first step to fixing it. Whether it’s the ice quality or how much ice it makes, there are steps you can take to solve the problem.
Ice Quality Problems
Ice quality issues can show up in many ways. This includes cloudy or discolored ice, ice that tastes odd, or ice that doesn’t form right. These problems usually come from a few common causes.how-to-draw-a-person
- Dirty or Clogged Components: If the ice maker’s parts are dirty or clogged, it can mess up the ice quality. Cleaning them regularly is key.
- Water Supply Issues: The quality of the water can also affect the ice. If the water is dirty or has too many minerals, the ice won’t be good.
- Incorrect Temperature Settings: If the temperature is off, it can mess up the freezing process. This can lead to ice that’s not fully frozen or has a weird texture.
To fix these problems, you need to find the main cause. For example, if it’s dirty parts, a good cleaning can solve it. Here’s a table that shows common ice quality problems and how to fix them:
| Issue | Potential Cause | Solution |
|---|---|---|
| Cloudy or Discolored Ice | Dirty or Clogged Components, Poor Water Quality | Clean the Ice Maker, Check and Improve Water Supply Quality |
| Odd-Tasting Ice | Contaminated Water Supply, Dirty Ice Maker | Check Water Supply, Clean the Ice Maker |
| Ice Not Forming Correctly | Incorrect Temperature Settings, Clogged Water Filter | Adjust Temperature Settings, Check and Replace Water Filter if Necessary |
Ice Production Issues
Ice production problems can be as frustrating as ice quality issues. If your ice maker isn’t making ice fast enough or not at all, there are several things to check.
“The most common cause of ice production issues is often related to the water supply line or the ice maker’s ability to receive the correct water pressure.” –
Some common causes include:
- Clogged Water Filter: A clogged water filter can block water flow to the ice maker, making it hard to make ice.
- Low Water Pressure: If the water pressure is too low, it can stop the ice maker from working right, leading to less or no ice.
- Faulty Thermostat or Control Board: Sometimes, the problem is with the thermostat or control board. If they’re not working right, it can stop ice production.
To solve these problems, start by checking the water filter and making sure the water supply lines are clear. You might need to adjust the thermostat or get a pro to fix the control board for more complex issues.how-to-clean-uggs
Maintaining Your Ice Maker
Keeping your ice maker in good shape is key for its long life and performance. Simple maintenance steps can help your ice maker make clean, fresh ice for years.
Regular Maintenance Tips
To keep your ice maker running well, regular maintenance is crucial. Here are some easy tips:
- Check and replace the water filter often for clean ice.
- Clean the ice maker’s condenser coils for better heat transfer.
- Look for blockages or kinks in the ice maker’s drain line.
These tips can help avoid problems and keep your ice maker working great.
Seasonal Care Suggestions
Seasons can affect your ice maker differently. Here are some seasonal care tips:
- In summer, check the water supply lines for wear or damage.
- In winter, protect your ice maker from freezing temperatures.
Seasonal maintenance can prevent damage and save you money. It ensures you have fresh ice all year.
I suggest looking at your ice maker’s user manual for specific care. Following these tips and being proactive can keep your ice maker working well for years.
When to Call a Professional
Regular cleaning and maintenance can fix many ice maker problems. But, some issues need a pro’s touch. If you see leaks, odd noises, or less ice than usual, it’s time to call for help.
Complex Issues Requiring Expertise
Problems like broken compressors, clogged condensers, or faulty control boards need special tools. DIY fixes can cause more harm or be unsafe.
Choosing the Right Service Provider
Find a certified technician with ice maker repair experience. Check online reviews and ask for referrals. Make sure they’re licensed and insured. Brands like Sub-Zero, Viking, and LG have authorized service providers.
Knowing when to call a pro ensures your ice maker gets the right care. This extends its life and keeps it working well.


