
A clogged dryer can be a fire hazard. It’s a shocking fact that lint buildup is a leading cause of dryer fires. Regularly cleaning your dryer is crucial for maintaining its efficiency and safety.
Cleaning your dryer is a straightforward process. It involves removing lint and debris from the venting system and dryer drum. By doing so, you’ll not only reduce the risk of fires but also improve your dryer’s performance and extend its lifespan.
Key Takeaways
- Regular dryer cleaning reduces fire hazards.
- Cleaning improves dryer efficiency and performance.
- A clean dryer extends the appliance’s lifespan.
- The process involves removing lint and debris.
- Cleaning is a straightforward and essential maintenance task.
Why Cleaning Your Dryer is Important
Keeping your dryer clean is more than just tidiness. It ensures your appliance works well and safely. A clean dryer cuts down fire risks and boosts performance.how-to-clean-wood-cutting-board
Benefits of Regular Cleaning
Regular cleaning of your dryer offers many key benefits:
- Improved efficiency: A clean dryer dries clothes faster and better.
- Reduced energy consumption: A well-maintained dryer saves energy, lowering bills.
- Enhanced safety: Cleaning out lint reduces fire risks.
- Extended appliance lifespan: Regular care extends your dryer’s life.
Signs Your Dryer Needs Cleaning
Knowing when your dryer needs a clean is crucial. Look out for these signs:
- Longer drying times: Clothes drying slowly can mean lint buildup.
- Burning smell: A burning smell means your dryer needs cleaning fast.
- Increased energy bills: A dirty dryer uses more energy, raising bills.
- Visible lint accumulation: Seeing lint around the dryer or in the vent means it’s time to clean.
By spotting these signs and cleaning your dryer often, you keep it safe and efficient.
Tools and Materials Needed for Cleaning
https://www.youtube.com/watch?v=FqwMNan_Uo8
Getting the right tools and materials is key to keeping your dryer working well. The right equipment makes cleaning easier and ensures your dryer is well-maintained.
Basic Cleaning Supplies
To begin cleaning your dryer, you’ll need some basic items. These include:
- A soft-bristled brush or a lint brush for gently removing lint and debris
- A vacuum cleaner with a hose attachment for reaching into tight spaces
- A damp cloth or sponge for wiping down surfaces
- Mild detergent or a dryer cleaning solution for tackling tough stains or odors
These basic supplies are crucial for regular dryer maintenance. They help keep your appliance running smoothly.how-to-clean-sink-drain
Optional Tools for Deep Cleaning
For a more detailed clean, consider these optional tools:
- A dryer vent cleaning kit, which includes a long, flexible rod that can be attached to a drill, allowing you to scrub the inside of the vent
- A dryer vent brush for manually cleaning the vent system
- A screwdriver or other tool for accessing the dryer’s internal components, if necessary
Using these tools can help you do a deeper clean. This is important if you haven’t cleaned your dryer in a while or if you see a lot of lint buildup.
With the right tools and materials, you’re ready to clean your dryer effectively. Regular cleaning with the right supplies helps prevent fires caused by lint buildup.
Cleaning the Dryer Lint Trap

Cleaning the lint trap is key to keeping your dryer working well and safely. The lint trap catches lint and debris from your clothes during drying. It’s important to clean it often to keep your dryer running right and avoid fires.how-to-clean-leather-car-seats
Step-by-Step Process
To clean the lint trap right, just follow these easy steps:
- Take out the lint trap after each use and remove any visible lint.
- Rinse it under running water to get rid of more lint or debris.
- Scrub it with a soft brush or cloth to remove tough lint or residue.
- Let the lint trap dry completely before putting it back to avoid water spots or mineral buildup.
By doing these steps, you make sure your lint trap is clean and works well. This keeps your dryer efficient and lowers the chance of lint problems.
Tips for Maintaining the Lint Trap
To keep your lint trap in top shape and your dryer running smoothly, try these tips:
- Clean the lint trap after every drying cycle to stop lint buildup.
- Look for damage or wear on the lint trap and replace it if needed.
- Make sure the lint trap fits right in its housing after cleaning to block lint.
Regular care of the lint trap is a simple but effective way to keep your dryer working well and safely. By making these habits part of your routine, you’ll have a dryer that works great and lowers the risk of dangers.
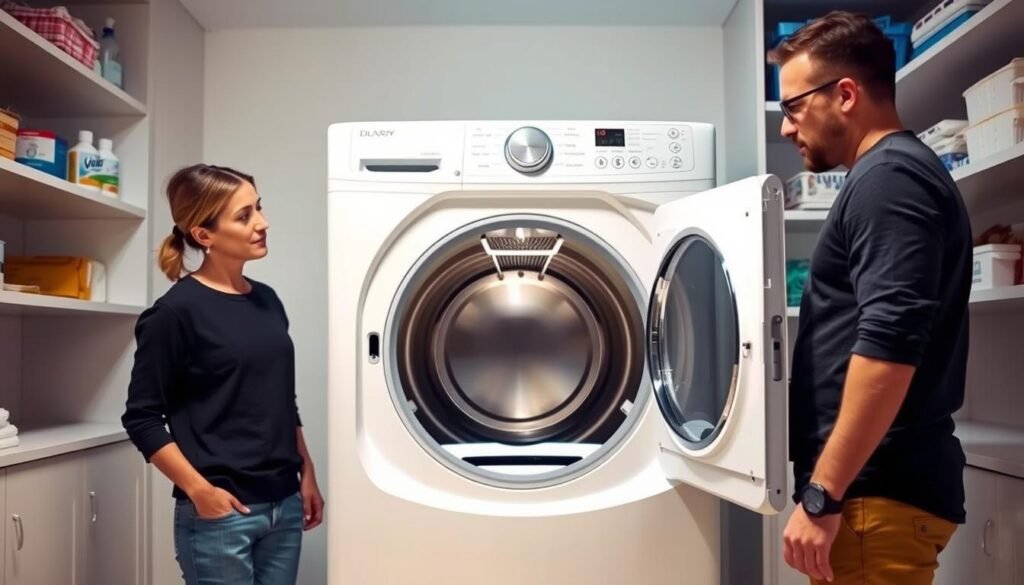
Vacuuming the Dryer Interior

Keeping your dryer efficient is easier with interior vacuuming. It removes lint and debris that can slow it down. Regular cleaning helps avoid airflow problems and saves energy.how-to-clean-sink-drain
Accessing the Dryer Interior
To vacuum inside, you first need to get to the dryer’s interior. Most dryers require removing the back panel or the lint trap housing. Always check your manual for the right steps, as models differ.
For example, I cleaned my dryer’s interior and found a lot of lint behind the lint trap. It was amazing how much debris had built up. Cleaning it out really improved the dryer’s performance.
Techniques for Efficient Vacuuming
When vacuuming, use a gentle setting to protect the dryer’s parts. Move slowly and carefully to get all the lint and debris. Focus on the drum and lint trap housing, as they collect the most.how-to-clean-jewelry-at-home
Key areas to focus on:
- The drum and its surrounding areas
- The lint trap housing
- The venting system connection points
For more detailed guidance, check out AHS. They offer detailed instructions on dryer maintenance.
After vacuuming, check the interior to make sure you’ve removed all lint and debris. This simple task can greatly improve your dryer’s efficiency and lifespan.
Cleaning the Dryer Vent System

To keep your dryer working well, cleaning the vent system is key. A clogged vent can raise energy bills, slow drying times, and even cause fires. This guide will show you why a clean vent system is vital.
Importance of a Clean Vent
A clean dryer vent helps your dryer run efficiently. Lint and debris in the vent block airflow, making your dryer work harder and use more energy. The U.S. Fire Administration says clogged vents are the main cause of dryer fires. Cleaning regularly prevents these dangers and keeps your dryer running right.how-to-clean-fresh-eggs
Also, a clean vent system lowers the risk of carbon monoxide poisoning by ensuring good ventilation. It’s not just about saving energy; it’s also about staying safe. Consumer Reports stresses, “Regular maintenance, including vent cleaning, is crucial for your dryer’s life.”
How to Disconnect the Vent
To clean, first disconnect the vent from your dryer. Start by unplugging your dryer for safety. Next, find the vent hose that connects to the wall outlet. You might need a screwdriver to remove the clamp holding the hose.
For detailed cleaning steps, check out this guide on cleaning a dryer vent. It offers clear instructions and tips for keeping your vent system in good shape.
After disconnecting, check the vent for blockages or lint. Use a vacuum or a dryer vent cleaning brush to clear out debris. Once clean, reconnect the vent hose securely to avoid future problems.
By following these steps, you’ll maintain a clean dryer vent system. Regular upkeep prevents common problems and extends your appliance’s life.
Deep Cleaning Your Dryer’s Exterior

Cleaning your dryer’s exterior is easy and keeps it running well. A clean dryer looks better and lasts longer. It also makes your laundry room look nicer.how-to-clean-leather-jacket
Recommended Cleaning Solutions
Choosing the right cleaner for your dryer’s outside is key. A mix of mild soap and warm water works for most. But, for tough stains, you might need a special cleaner.
- Mild soap and water for general cleaning
- Specialized stainless steel cleaners for stainless steel dryers
- Non-abrasive all-purpose cleaners for other finishes
Stay away from harsh chemicals and rough cleaners. They can harm your dryer’s finish. Always check the cleaner’s instructions first.
Techniques for Streak-Free Shine
To get a streak-free shine, follow these steps:
- Dampen a soft cloth with your chosen cleaning solution.
- Wipe the dryer gently, following the grain if it’s stainless steel or wood.
- Buff the surface with a dry cloth to remove streaks and moisture.
For hard stains, you might need to clean a few times. Regular cleaning keeps your dryer looking good and prevents grime.
| Cleaning Method | Best For | Tips |
|---|---|---|
| Mild Soap and Water | General Cleaning | Use a soft cloth to avoid scratches. |
| Stainless Steel Cleaner | Stainless Steel Dryers | Follow the product instructions for best results. |
| Non-Abrasive All-Purpose Cleaner | Other Finishes | Test on a small area first to ensure compatibility. |
By using the right cleaners and techniques, you can keep your dryer looking great. It will also work better for longer.
Inspecting and Maintaining Dryer Parts
Checking and keeping dryer parts in good shape can really boost its performance. Regular checks help spot worn-out parts that might cause problems or safety risks. By looking after key parts, you can make sure your dryer works its best.
Key Components to Inspect Regularly
There are several parts you should check often to keep your dryer running smoothly. These include:
- The drum and its bearings, which can wear out over time
- The door seal, ensuring it remains intact and functional
- The belt, checking for signs of wear or breakage
- The lint filter and venting system, crucial for airflow and efficiency
Regular inspection of these parts can stop common issues like higher energy bills or slower drying times.
When to Replace Worn Parts
It’s important to know when to swap out worn parts to keep your dryer running well. If you see signs like odd noises, less efficiency, or visible damage, it’s time to think about replacing them.
For example, a worn-out belt can make the dryer vibrate too much or be very loud. Also, a damaged door seal can cause heat to escape, making drying times longer.
Swapping out these parts not only makes your dryer more efficient but also safer. It’s a good idea to check your dryer’s manual or talk to a pro if you’re not sure about replacing parts.
Preventing Future Dryer Issues
Keeping your dryer in good shape is more than just cleaning the lint trap. To make sure it works well and safely, follow a few simple steps. These habits can greatly lower the chance of future problems.
Tips to Reduce Lint Buildup
It’s key to stop lint buildup to avoid dryer troubles. Here are some good tips:
- Always clean the lint trap after each use to stop lint from building up.
- Make sure to clean the dryer vent system once a year for good airflow.
- Don’t overload the dryer, as it can make more lint.
- Choose a dryer with a moisture-sensing feature to cut down on lint by avoiding over-drying.
Recommended Drying Practices
Using the right drying methods can also prevent dryer problems. For example, check out CNET’s guide on deep cleaning your dryer to learn more about keeping it in top shape.
| Drying Practice | Benefit |
|---|---|
| Sorting clothes before drying | Reduces lint generation and prevents damage to clothes. |
| Using the correct dryer cycle | Ensures optimal drying performance and reduces wear on the dryer. |
| Avoiding fabric softener sheets | Reduces residue buildup in the dryer and on clothes. |
By following these tips and practices, you can greatly lower the risk of dryer problems. This ensures your appliance keeps working efficiently.
Scheduling Professional Cleaning Services
Knowing when to get professional help for your dryer can save you time and money. While you can do some maintenance yourself, some jobs need a pro’s touch.
When to Consider Hiring a Pro
If you see any of these signs, it’s time to call a professional:
- Your dryer is taking longer than usual to dry clothes.
- There’s a noticeable buildup of lint around the dryer or vent.
- You hear unusual noises coming from the dryer.
- You’ve tried cleaning the dryer yourself but still have problems.
Professional cleaners have the right tools and know-how to clean your dryer and vent system. They ensure your dryer works well and safely.
What to Expect from Professional Services
When you hire a professional dryer cleaning service, they’ll inspect and clean your dryer and vent system. Here’s what you can expect:
| Service | Description |
|---|---|
| Dryer Inspection | A thorough check of the dryer’s condition, including the drum, lint trap, and other key parts. |
| Vent Cleaning | Cleaning the vent system to remove lint, debris, and other blockages that can cause inefficiency or fires. |
| System Check | A check of the entire drying system to make sure it’s working right and safely. |
For more info on dryer vent cleaning and to find a professional service near you, visit Dryer Vent Wizard.
Conclusion: Enjoy an Efficient Dryer
Keeping your dryer in good shape is key for its performance and life span. By following the cleaning tips in this guide, you can make sure your dryer works well and safely.
Key Takeaways for a Cleaner Dryer
It’s important to clean the lint trap often, vacuum the dryer inside, and check the vent system. These easy steps can lower fire risks and make your dryer more efficient. For more tips on dryer care, check out The Lint Guy’s detailed guide.
Final Maintenance Tips
To keep your dryer in top shape, make sure to clean the vent system once a year. Regular upkeep not only extends your dryer’s life but also cuts down on energy bills. By following these tips, you’ll have an efficient dryer that works great.


