
A dirty humidifier can be a breeding ground for bacteria and mold. This can make breathing problems like asthma worse. In fact, a study found that nearly 50% of humidifiers are contaminated with bacteria. This shows how important it is to clean them regularly.
As I guide you through the process of cleaning your humidifier, you’ll learn how to keep the air clean. You’ll also learn how to stop mold and bacteria from growing. For a detailed guide, you can visit Home Depot’s guide on cleaning humidifiers.
Key Takeaways
- Unplug the device before cleaning to ensure safety.
- Disassemble and soak parts in white vinegar to remove mineral deposits.
- Disinfect the water tank with a bleach solution to kill bacteria.
- Rinse thoroughly and dry parts to prevent water spots.
- Regular cleaning can improve the humidifier’s efficiency and longevity.
Why Cleaning My Humidifier is Important
Keeping my humidifier clean is key for my health and home air quality. A dirty humidifier can harbor mold, bacteria, and other harmful germs. These can spread in the air, making breathing problems like asthma worse.
By cleaning my humidifier regularly, I lower the chance of spreading these harmful germs. For more tips on using and caring for humidifiers safely, I check out WebMD. They offer detailed advice on humidifier maintenance.
Health Benefits of a Clean Humidifier
A clean humidifier means the air it releases is safe from harmful stuff. This is very important for people with weak immune systems or breathing problems. Regular cleaning stops mold and bacteria from growing, which can cause health problems.
The benefits of a clean humidifier include:
- Less chance of getting respiratory infections
- Helps prevent asthma attacks and breathing troubles
- Reduces exposure to harmful bacteria and mold
Preventing Mold and Bacteria Growth
Mold and bacteria love moist places, making humidifiers a risk if not cleaned. Regular cleaning and drying stop these germs from growing.
| Cleaning Frequency | Prevention Method |
|---|---|
| Daily | Empty and dry the tank |
| Weekly | Clean the tank and parts with a disinfectant |
| Monthly | Deep clean all parts, including the base and filters |
Improving Air Quality in My Home
A clean humidifier is good for my health and makes my home air better. By keeping my humidifier clean, I create a healthier indoor space. This is crucial during dry seasons when humidifiers are used more.
To make air quality even better, I use distilled water in my humidifier. It has fewer minerals that can cause dust or scale buildup.
Gather Necessary Cleaning Supplies

To clean my humidifier well, I need the right supplies. This helps me keep it clean and stop mold and bacteria from growing.
Essential Tools for the Job
For cleaning, I use a soft-bristled brush, a microfiber cloth, and a cleaning solution. The brush is for gently removing debris and mineral deposits. The microfiber cloth is great for cleaning surfaces.
- A soft-bristled brush for gentle cleaning
- A microfiber cloth for wiping down surfaces
- A container for mixing cleaning solutions
Recommended Cleaning Solutions
I can clean my humidifier with water and white vinegar or a special cleaning solution. White vinegar is good because it’s antibacterial and removes mineral deposits.
Recommended cleaning solutions include:
- White vinegar and water mixture
- Specialized humidifier cleaning solutions
- Mild dish soap (for some humidifier models)
Optional Items for Deep Cleaning
For a deeper clean, I might use a descaling solution or a disinfectant spray. Having distilled water ready also helps prevent mineral buildup.
| Supply | Purpose |
|---|---|
| Soft-bristled brush | Gentle cleaning of humidifier parts |
| Microfiber cloth | Wiping down surfaces |
| White vinegar | Natural antibacterial agent and mineral deposit remover |
| Descaling solution | Removing mineral buildup |
How Often Should I Clean My Humidifier?

How often you should clean your humidifier depends on how much you use it. It’s key to remember that cleaning it regularly is not just for the device. It’s also about keeping you and your family healthy.
Guidelines Based on Usage
If you use your humidifier every day, clean it every 3 to 5 days. This helps stop harmful bacteria, mold, and mineral buildup. If you use it less often, you can wait longer, but still clean it well before storing.
Here are some general guidelines based on usage:
- Daily usage: Clean every 3-5 days
- Occasional usage: Clean every 1-2 weeks
- Rare usage: Clean before storing
Signs That My Humidifier Needs Cleaning
Even if you don’t use your humidifier a lot, there are signs it needs cleaning. Look out for:
- Visible mold or mineral deposits
- Unpleasant odors from the device
- Less mist or poor performance
- Changes in water taste or smell
If you see any of these signs, clean your humidifier right away. This keeps your environment healthy and prevents bigger problems.
Step-by-Step Cleaning Process

I’ll show you how to clean your humidifier to keep it working well. Cleaning your humidifier is easy and involves a few key steps.
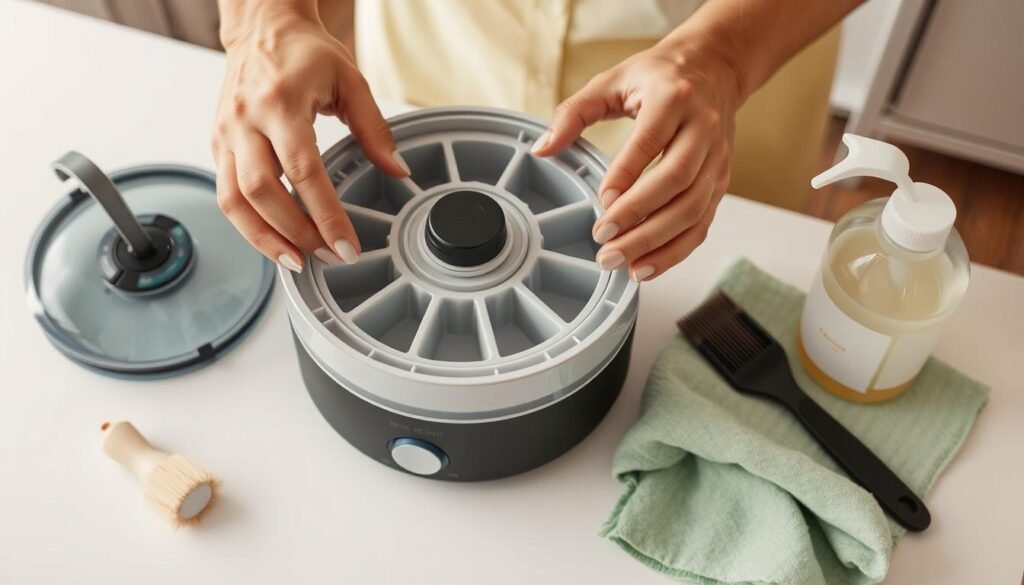
Disassembling My Humidifier
The first step is to take apart your humidifier. I start by unplugging it and removing parts like the water tank and filters. This lets me clean all the important areas.
Cleaning the Water Tank
The water tank is where bacteria and mold grow. So, it needs a good clean. I rinse it with warm water and then use a vinegar solution to remove mineral deposits and bacteria. After that, I rinse it well to get rid of any vinegar smell.
Wiping Down the Exterior
Next, I clean the outside of the humidifier with a damp cloth. This gets rid of dust and splashes. For tough stains, I use a gentle cleanser and then wipe it clean with a damp cloth.
A Deep Dive into the Base Components
The base of the humidifier, with its motor and electronics, needs careful cleaning. I use a soft-bristled brush or cotton swab to remove dust and debris. It’s important not to get liquids into the electrical parts to avoid damage.
By following these steps, I keep my humidifier clean, efficient, and safe. Regular cleaning not only improves the air quality in my home but also makes the humidifier last longer.
Tips for Cleaning Different Types of Humidifiers

The type of humidifier you use affects how you clean it. Each humidifier has special features that need their own cleaning method.
Ultrasonic Humidifiers
Ultrasonic humidifiers make mist with high-frequency vibrations. To clean one, mix water and white vinegar in the tank. Let it sit for 30 minutes to break down mineral deposits.
Next, use a soft-bristled brush to scrub off any buildup. Rinse with clean water to get rid of vinegar taste and smell.
Key cleaning steps for ultrasonic humidifiers include:
- Mixing a water and vinegar solution in the tank
- Letting it sit for 30 minutes
- Gently scrubbing with a soft-bristled brush
- Rinsing thoroughly with clean water
Evaporative Humidifiers
Evaporative humidifiers, or cool mist humidifiers, use a fan to blow air through a wet wick or filter. Clean these by replacing the wick or filter as the manufacturer suggests. Also, wash the water tank and base with mild detergent and warm water.
Make sure to dry all parts well to stop bacteria from growing. For more cleaning tips, visit https://www.housework.com/how-to-clean-and-maintain-a-humidifier/.
Steam Vaporizers
Steam vaporizers boil water to make steam. To clean one, unplug it and let it cool. Then, soak the tank in water and vinegar to remove mineral deposits.
Wipe the outside and other parts with a soft cloth. Be careful with hot parts and always check the manufacturer’s cleaning guide.
By following these tips for your humidifier type, you can keep it clean and working well. Regular cleaning boosts your humidifier’s performance and helps keep your home healthy.
Special Considerations for Hard Water

Hard water can really affect your humidifier’s performance. You’ll need to clean it more often. Hard water has lots of minerals like calcium and magnesium. These can build up in your humidifier.
Effects of Hard Water on Humidifiers
Hard water can cause scaling and mineral deposits in your humidifier. This can make it less efficient. It might also lead to bacteria and mold growth. Plus, it can clog parts, making it hard for your humidifier to work right.
Some common problems with hard water include:
- Mineral deposits on the humidifier’s surfaces
- Reduced mist output due to clogged nebulizers or other parts
- Increased risk of bacterial and mold growth
Best Cleaning Practices for Hard Water Buildup
To fight hard water buildup, you need a more detailed cleaning plan. Using distilled water can help. A mix of water and white vinegar can also dissolve mineral deposits.
Here are some tips to keep your humidifier in good shape:
- Fill your humidifier with distilled water whenever you can.
- Clean your humidifier more often if you see mineral buildup.
- Soak removable parts in a vinegar solution to get rid of mineral deposits.
By following these steps, you can keep your humidifier working well. This is true even in places with hard water.
How to Prevent Mineral Buildup

To keep your humidifier working well, it’s key to stop mineral buildup. This happens when water with lots of minerals, like calcium and magnesium, dries up and leaves deposits. These deposits can block your humidifier and make it less effective.
Using Distilled Water
Using distilled water in your humidifier is a smart move. Distilled water is purified to remove minerals and other stuff, which means less chance of mineral buildup. It might cost more than tap water, but it’s worth it to keep your humidifier running well for longer.
Regular Maintenance Tips
Regular upkeep is vital to avoid mineral buildup. This means cleaning your humidifier often, looking for mineral deposits, and swapping out parts when needed. Keeping up with maintenance helps catch problems early and prevents big issues later.
Regular Maintenance Schedule:
| Maintenance Task | Frequency |
|---|---|
| Clean the humidifier | Every 3-5 days |
| Check for mineral deposits | Weekly |
| Replace filters or parts | As recommended by the manufacturer |
Keeping the Humidifier in Good Shape
Using distilled water and regular maintenance are just the start. You should also make sure your humidifier is put together right, check for blockages, and store it right when you’re not using it.
By taking these steps, you can stop mineral buildup and keep your humidifier working well. A well-kept humidifier not only works better but also keeps your home air healthier for you and your family.
Troubleshooting Common Humidifier Issues
If your humidifier isn’t working right, there are steps to fix it. You need to find out what’s wrong, like strange noises or smells. Then, you can take action to make it work again.
Identifying Unusual Noises
Strange sounds from your humidifier might mean a few things. Often, it’s because of mineral buildup. Try cleaning it with water and white vinegar. Or, it could be a dirty filter. Check your manual to see how to clean or change it.
For example, someone on a home forum said their humidifier was rattling. After cleaning it, they found a loose part. Tightening it fixed the problem.
Smells Coming from My Humidifier
Bad smells from your humidifier mean mold or bacteria. Clean and disinfect it often. Use water and bleach to sanitize. Make sure to rinse it well after to get rid of bleach smell.
“Regular maintenance is key to preventing the growth of mold and bacteria in your humidifier.”
Poor Performance and Low Output
If your humidifier isn’t making mist or isn’t working well, there are reasons. First, check the water level and if it’s put together right. Mineral buildup can also cause problems. Look in your manual for how to descale it. For more help, check Total Home Supply’s Humidifier Troubleshooting page.
| Issue | Possible Cause | Solution |
|---|---|---|
| Unusual Noises | Mineral buildup or dirty filter | Clean with vinegar or replace filter |
| Unpleasant Smells | Mold or bacteria growth | Clean and disinfect with bleach solution |
| Poor Performance | Low water level or scale buildup | Check water level and descale humidifier |
By following these steps, you can fix common humidifier problems. This ensures it keeps your home air clean and moist.
How to Store My Humidifier Properly
To keep your humidifier in good shape when not in use, proper storage is key. This means following a few steps to keep it clean, dry, and free from bacteria.
Preparing My Humidifier for Off-Season
Before you store your humidifier, make sure it’s ready for the off-season. Start by emptying the water tank and any other water-holding parts. Experts say,
“Draining and drying your humidifier is the first step towards preventing mold and bacteria growth” (– Humidifier Maintenance Guide)
Cleaning Before Long-Term Storage
Cleaning your humidifier before storage is crucial. Mix water and vinegar to descale and clean it. Make sure all parts are dry to avoid moisture buildup. It’s recommended to clean your humidifier thoroughly before storing it to maintain its hygiene and functionality.
Also, store your humidifier in a dry spot, away from sunlight. Regular checks on stored humidifiers can spot issues early.
By following these steps, your humidifier will stay in great shape during the off-season. Proper storage not only extends its life but also makes it ready for use when needed again.
Environmental Factors Affecting My Humidifier
It’s important to know how the environment affects my humidifier. Its performance isn’t just about its parts. It also depends on my home’s conditions.
Humidity Levels in My Home
The humidity in my home is key to my humidifier’s work. If the air is already humid, it doesn’t have to work as hard. But in dry air, it must work harder to reach the right humidity.
Keeping humidity between 30-50% is best for comfort and to stop mold. I can use a hygrometer to check humidity levels. For more tips on humidity and cleaning, I can look at Healthline’s guide on how to clean a humidifier.
The Impact of Air Quality on Performance
Air quality also affects my humidifier. Bad air quality can fill the humidifier with dust and particles. This makes it less efficient and can spread harmful stuff in the air.
By keeping an eye on these factors, I can make my humidifier work better. This helps it keep my home healthy and comfortable.
When to Replace My Humidifier
My humidifier will show signs of aging over time. It’s important to notice these signs to keep the air quality good. This ensures the device works well.
I need to watch for signs that my humidifier needs to be replaced. Experts say, “A humidifier’s lifespan can vary. But usually, it’s best to replace it every 3 to 5 years.” Is it time to replace your humidifier
Signs of Wear and Tear
It’s crucial to recognize wear and tear on my humidifier. This helps me know when it’s time for a new one. Common signs include:
- Visible mineral buildup or scaling
- Unusual noises or vibrations
- Reduced mist output or performance
- Leaks or cracks in the tank or other components
Evaluating the Cost of Repair vs. Replacement
If I see any of these signs, I need to decide whether to repair or replace. I should think about the cost of parts, the repair’s complexity, and the humidifier’s age.
| Factor | Repair | Replacement |
|---|---|---|
| Cost | $20-$50 | $50-$100 |
| Complexity | Simple to complex | N/A |
| Age of Humidifier | Less than 3 years | More than 3 years |
If repair costs more than half of a new humidifier, it’s time for a replacement. Replacing it on time can prevent bigger problems later.
“Regular maintenance can extend your humidifier’s life. But, replacement is inevitable. Knowing when to replace it is key to good air quality.”
Understanding Humidifier Models
There are many humidifiers available, and knowing the different types is key. Each humidifier has its own special features and benefits.
Choosing the Right Humidifier for My Needs
When picking a humidifier, think about the room size, humidity needs, and what you like. For big rooms, you might need a humidifier that can handle more moisture. For a baby’s room, look for one that’s quiet and has a nightlight.
Key considerations include:
- Room size and layout
- Desired humidity level
- Noise level tolerance
- Additional features like antimicrobial treatment or remote control
Comparing Features and Functions
Humidifiers vary in what they offer. Some have a humidistat to control humidity levels. Others have a warm mist option for cold weather.
As Consumer Reports suggests, “Look for features that fit your needs, like a filter for mineral reduction or easy cleaning designs.”
“A humidifier with a built-in humidistat can help maintain a comfortable humidity level, which is important for people with respiratory issues.”
Knowing what each humidifier model offers helps you pick the right one. This way, you get a humidifier that fits your needs and preferences.
Resources for Additional Information
I’ve put together a list of reliable sources to help you keep your humidifier in top shape. Whether you need expert advice or want to learn more about humidifier care, these resources will be useful.
Where to Find Expert Advice
For top-notch advice on humidifier upkeep, check out the websites of well-known manufacturers. They offer detailed guides on how to clean a humidifier and how to keep it running well. Health and home improvement websites also publish articles on the best humidifier care practices.
Some of the best resources include:
- Manufacturer’s websites
- Home improvement blogs
- Health-focused websites
Recommended Websites and Forums
Online forums and community websites are also great resources. They let you ask questions, share your experiences, and get advice from others who’ve faced similar problems.
| Resource Type | Examples | Benefits |
|---|---|---|
| Manufacturer Websites | Honeywell, Levoit | Detailed product care instructions |
| Home Improvement Blogs | The Spruce, HomeAdvisor | Tips on maintenance and troubleshooting |
| Health-Focused Websites | Healthline, Mayo Clinic | Health implications of improper humidifier care |
By checking out these resources, you’ll learn more about caring for your humidifier. This will help it keep working well and provide the benefits you need.
Conclusion: Maintaining a Healthy Humidifier
By following the steps in this guide, I can keep my humidifier working well. This means I get to enjoy a healthier and more comfortable home.
Key Takeaways for Effective Maintenance
Regular cleaning is key to stop mold and bacteria. It also keeps my humidifier running smoothly. I’ll clean it often, using the right tools and methods.
Commitment to Regular Maintenance
Maintaining a healthy humidifier is a big job. I’ll keep up with regular checks and cleanings. This way, my humidifier will keep working well and keep my family healthy.
Keeping my humidifier clean is important for my home. It helps the air quality and reduces health risks. I’ll keep up with cleaning to make sure my home stays healthy and comfy.


