
We know keeping indoor air healthy matters for every home. We’ll walk through a simple roadmap that makes unit maintenance quick and reliable. Our goal is to help you avoid musty smells, white dust, and uneven moisture without fuss.
Most makers suggest weekly attention, while EPA guidance leans toward cleaning and disinfecting every three days for the best protection. With clear steps and safe products, we remove guesswork and show when to use vinegar, hydrogen peroxide, or a dilute bleach mix.
We cover daily, weekly, and monthly tasks, safe disassembly, and smart tips to prevent scale and biofilm. By the end, you’ll have a compact routine and a checklist that keeps humidifiers running like new all season.
Key Takeaways
- Follow regular maintenance to protect indoor air and performance.
- Use the right products for your unit and timing for each task.
- Handle electronics safely during disassembly and reassembly.
- Prevent mineral scale and biofilm with simple habits.
- Adopt a daily, weekly, and monthly cadence that fits your life.
Why a Clean Humidifier Matters for Healthy Air and Better Performance
A neglected unit can turn a helpful appliance into a source of indoor irritants. Stagnant water inside a tank encourages bacteria and mold growth, and those microbes may travel back into our air when the device runs.
Minerals dissolved in water leave limescale on internal parts. Over months, this scale restricts flow, lowers mist output, and forces the unit to work harder. That means more noise, inconsistent humidity, and lingering odors.
What happens when moisture meets minerals and bacteria
Standing water becomes a breeding ground for bacteria and mold. The EPA recommends disinfecting every three days for best protection. Left unchecked, biofilm and scale can clog passages and damage sensors.
Benefits we gain from regular cleaning and descaling
- Better air quality: Fewer microbes and particles released into the home.
- Improved performance: Even mist output, quieter operation, and longer unit life.
- Less maintenance time: A short routine prevents major scale buildup and costly repairs over years.
Safety First and What We’ll Need to Clean the Humidifier
Before we touch any parts, safety steps keep the task quick and risk-free. Unplug the unit and read the user manual for model-specific instructions.
Essential supplies
We gather white vinegar for scale removal, 3% hydrogen peroxide or a mild bleach option for disinfection, a soft brush for tight spots, clean water for rinses, and lint-free cloths for finishing touches.
Key cautions
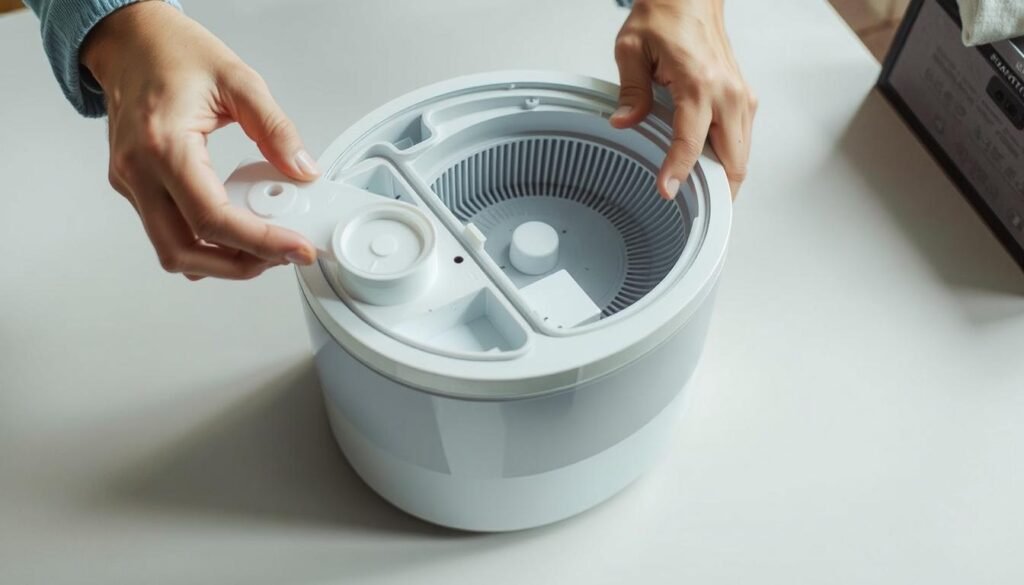
We always unplug first and remove the tank, base tray, and other parts carefully so seals and small pieces stay intact. Never immerse any component that has electronic parts; instead, wipe those areas gently and keep connections dry.
- Mixing warning: Never mix vinegar and bleach—this can make a toxic gas. Use one solution at a time and rinse well between methods.
- For descaling, use a diluted solution (roughly 2 tablespoons of white vinegar per half gallon of water) and let stubborn deposits soak about 20 minutes before we scrub with a soft brush.
- Keep plenty of clean water ready for multiple rinses so no residue or scent remains in the tank or base.
Tip: Stage parts on a towel as you work. That keeps everything organized and makes reassembly faster and safer.
how to clean humidifier the easy way with vinegar
A simple vinegar soak cuts through mineral scale and freshens the water tank fast. We use a straightforward routine that needs only white vinegar, plain water, and a soft brush.
Disassemble, empty, and wet the tank and base with vinegar. Unplug the unit, remove the water tank, and empty any standing water. Pour one to two cups of white vinegar into the humidifier tank, swish so every surface is wet, then place the tank on the base so vinegar drains into the tank base.
Soak mineral deposits for 15-30 minutes, then scrub with a soft brush
Let the vinegar sit about 15–20 minutes (up to 30 minutes for heavy buildup). This loosened scale and mineral deposits so scrubbing takes less time.
Use a soft brush to reach corners, cap threads, and valve areas. Be gentle and avoid scratching seals.
Rinse thoroughly and air dry to remove residue and scent
Rinse all parts with plenty of water until no vinegar scent remains. If needed, run one cycle with clean water after reassembly.
Let every part air dry on a clean towel before reassembly for best results.
- Quick soak: 1–2 cups undiluted vinegar for most tanks.
- Diluted option: 2 tablespoons vinegar per half gallon water for mild vinegar water treatment.
- Repeat soak if mineral deposits persist.
Deep Disinfection Options: Hydrogen Peroxide or Bleach Solution
When everyday rinses leave visible mold or the unit has sat unused, a deeper disinfectant step keeps our air safer. We choose an approach based on the problem: a milder peroxide mix for routine disinfection, or a dilute bleach solution when mold or heavy biofilm is present.

When we pick peroxide versus a dilute bleach mix
We use 3% hydrogen peroxide when we want a gentler disinfectant that still kills many microbes. It works well after a vinegar water soak and for routine resets.
For visible mold or long idle periods, we select a dilute bleach solution for a deeper reset.
Bleach mix ratio and dwell time
Follow precise steps: mix one teaspoon of liquid chlorine bleach per gallon of water. Pour roughly half to three-quarters of that mix into the tank and swish so every surface is wet.
Seat the tank on the base so solution drains into internal channels and let it sit about 15–20 minutes. This dwell time helps break down biofilm and stubborn mold.
Rinse until odor is gone and let parts dry completely
Empty both tank and base and rinse with plenty of clean water. Repeat rinses until no bleach scent remains so no residual chemicals mist into the room.
For peroxide, fill with a peroxide-and-water solution, let it sit roughly 10 minutes, then rinse well.
Never mix bleach and vinegar. Rinse thoroughly before switching methods. Finish by using a small brush on stubborn spots, then air dry all parts completely, paying attention to caps, gaskets, and seams.
- Key safety: follow labeled directions and keep solutions away from children and pets.
- Final check: no scent, fully dry, reassemble and run a water-only cycle if desired.
Cleaning by Humidifier Type: Evaporative, Ultrasonic, and Warm-Mist
Different models need targeted care to keep performance steady and air safe. We match methods to each design so parts last longer and the unit runs quietly.
Evaporative units and wick filters: replace, don’t wash
Evaporative models use a paper-like wick filter. We never wash that wick because scrubbing can damage fibers and remove coatings.
Replace the filter at the interval in the manual and flip it when refilling to encourage even wear. Remove the filter before wiping the tank and base and follow manufacturer’s instructions for reassembly.
Ultrasonic discs: gentle swabs and care
For ultrasonic designs, we clean the vibrating disc with a cotton swab dipped in vinegar. Use light pressure to avoid scratches that hurt output.
Warm-mist heating elements: safe descaling
If minerals or mineral deposits form, soak the heating element in undiluted vinegar about 30 minutes. Use a soft brush to lift buildup, rinse well, and let everything dry before testing.
- Tailor frequency by model: ultrasonic discs may need more attention in hard water.
- Confirm correct reassembly so the unit seals and runs without leaks.
Our Routine to Keep a Humidifier Clean Daily, Weekly, and Monthly
Daily habits and a simple calendar make maintenance painless and effective. Small, regular actions stop buildup and guard indoor air.

Daily
Each day we empty the tank and reservoir when the unit is not in use. Bacteria can grow in as little as one to two days, so this short task matters.
We give a quick rinse with clean water and set parts aside to air dry. This prevents microbes from getting a head start.
Weekly
Once a week we pour one to two cups of undiluted white vinegar into the tank, let it stand 15–20 minutes on the base, then scrub gently.
Rinse thoroughly and let everything air dry before reassembly for a reliable, odor-free result.
Monthly
Each month we perform a more thorough cleaning and optional disinfection. For heavy biofilm, mix one teaspoon of bleach per gallon of water and disinfect for 15–20 minutes.
Rinse until no scent remains and let parts dry completely before use.
Pro tips
- Use distilled water when possible to reduce scale and extend the time between descaling.
- Replace wick filters every 30–60 days, flip the wick at each refill, and swap a filter sooner if it smells or looks crusty.
- Watch for early signs of mold or slime; treat promptly with a peroxide rinse or a mild bleach cycle and then rinse well.
Breathe Easier Starting Today
We wrap it up with a simple plan. Use white vinegar for descaling, switch to a safe disinfecting solution when needed, and rinse until no scent remains so your clean humidifier only releases pure moisture into the air.
Commit a few minutes each day to empty and rinse the tank and a weekly session for a thorough cleaning. For tougher issues, use one teaspoon of bleach per gallon and let the solution sit 15–20 minutes, or choose hydrogen peroxide for a gentler option.
Watch for buildup and replace the filter every 30–60 days. Let all parts dry completely before reassembly, refill with distilled water when possible, and keep this maintenance routine going so your humidifiers run quietly and your home breathes easier for years.


