
Surprising fact: over one-third of home pans show early corrosion when people store them damp, and most problems start when the seasoning layer breaks down.
I repair my cookware the same way every time: identify the problem, then follow a clear step sequence so the pan returns to daily use without drama. My routine is simple and repeatable.
First, I scour the affected area, wash with warm soapy water, and dry the surface completely with a towel and low stove heat. Next, I apply a very thin coat of oil and bake the pan upside down at 450–500°F for an hour with foil below to catch drips.
I explain which tools I keep on hand and how I decide between a light scrub and a deeper restoration. My goal is a smooth iron surface and a durable seasoned layer that cooks evenly and releases food predictably.
Key Takeaways
- I follow one clear step: scour, wash, dry, oil, bake, and cool.
- Complete drying and a very thin oil coat are essential for good seasoning.
- Oven heat at 450–500°F for an hour builds a reliable finish.
- I choose the fix based on how severe the corrosion looks.
- Post-care keeps the pan ready for everyday cooking.
Why Rust Happens and Why It Matters Right Now
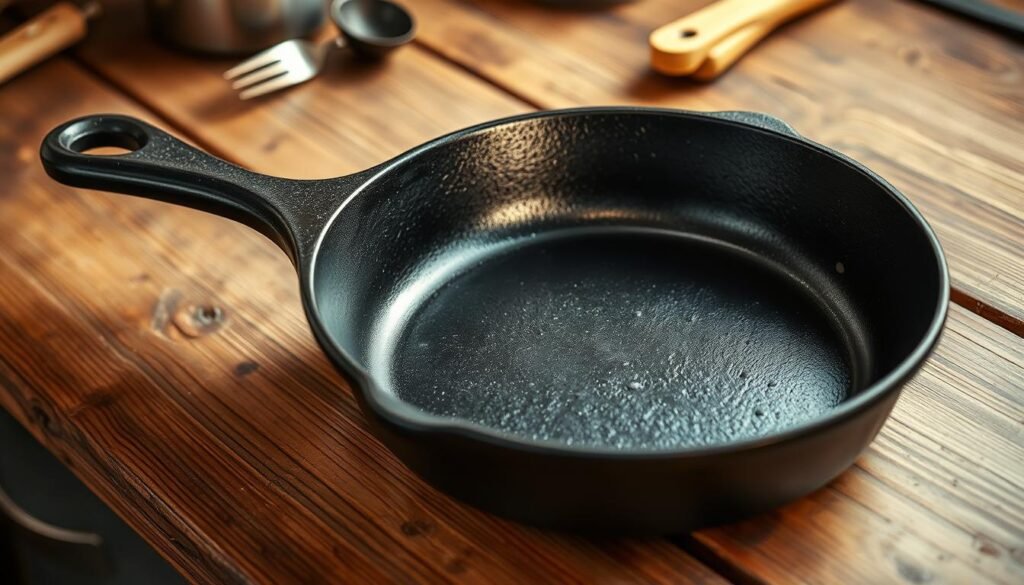
When the thin oil film bonds to metal, it becomes the shield I count on in the kitchen. That layer—seasoning—is a polymerized, carbonized oil surface that protects my cast iron pan from moisture and gives a natural nonstick feel.
What seasoning is and how it protects your pan
Seasoning is a tough, bonded coat of polymerized oil. It blocks water and oxygen and keeps the metal surface smooth for better cooking and release.
Even well-seasoned cookware can show iron rust if I soak a pan, let the dish air-dry, run it in a dishwasher, or stash pans where moisture lingers. Small slips in drying or storage are the usual triggers.
Food safety note: why corrosion shouldn’t touch your food
The USDA warns that rust is not food safe. I remove any iron rust fully before I let ingredients touch the surface again.
| Cause | Effect on Surface | Quick Action I Take |
|---|---|---|
| Soaking in water | Scale and surface pitting | Dry immediately and reseason |
| Dishwasher use | Strips protective coating | Avoid machine wash; rebuild seasoning |
| Damp storage | Localized corrosion spots | Store dry, add thin oil layer |
| Air-drying after dish | Surface oxidation | Wipe, heat-dry on stove |
I want corrosion stopped fast so the pan performs reliably. This guide helps me balance scrubbing, drying, and reseasoning without overworking the surface. For a practical restoration checklist, I link a trusted guide that walks through each step in detail: restoring a rusty skillet.
What I Use to Remove Rust and Reseason the Pan

My restoration kit is small, but every item earns its place during a repair. I gather tools and work in a clear order so I don’t leave moisture or excess oil on the cookware.
Essentials
Steel wool is my go-to for the initial scrub; the steel wool cuts through surface oxidation without harming a sturdy pan when I work carefully.how-to-clean-airpods
I rinse with warm water and a little soap, then dry completely with a paper towel or lint-free towel. I also warm the pan on low stove heat for a minute to be sure no damp spots remain.
Oil and heat
I use vegetable oil as my seasoning medium. I apply a very thin layer with a lint-free cloth, wiping away any excess so the layer will polymerize evenly in the oven.
I set the oven to 450–500°F, place aluminum foil on the lower rack to catch drips, and bake the pan upside down for an hour. Then I let it cool inside the oven so the new seasoning cures without shock.
Nice-to-haves
- A short 50/50 vinegar and water soak can loosen light oxidation before scrubbing.
- Aluminum foil on the lower rack keeps the oven clean from tiny oil weeps.
- Keeping towels, soap, and tools laid out ahead of time makes the process fast and repeatable.
How I Choose the Best Method Based on Rust Level

I size up the pan at a glance, noting whether the surface shows a fine haze or deeper orange patches. That quick read guides my next steps and keeps the repair efficient.how-to-clean-your-phone-from-virus-for-free
Light surface issues
If the problem is a light haze, I reach for steel wool and a little soap. A firm, brisk scrub with steel wool and warm water removes most of the discoloration in minutes.
I rinse thoroughly and dry every inch with a towel, then warm the pan briefly on the stove so no damp spots remain.
Stubborn spots
When orange or brown patches resist, I use a short 50/50 vinegar and water soak to loosen the oxidation. I watch the clock by the minutes and never leave the solution longer than needed.
After the soak I scrub again with steel wool, working in light passes until the surface feels even. Then I rinse, dry completely, and move on to reseasoning.
- Tip: repeat light passes rather than pressing hard.
- Tip: once cleared, I season the entire pan so the protective layer is uniform.
I treat every case the same at the finish—thorough drying, a very thin oil coat, and an oven bake at 450–500°F for an hour—so the pan returns to regular use with a durable surface.
How to Clean Rust Off Cast Iron: My Step-by-Step Process

A clear sequence of simple tasks brings the pan back to cooking shape quickly. I keep each step short and repeatable so the finish rebuilds evenly and lasts.
“Do the work in steady stages: scour, wash, dry, oil, oven, and cool.”
Scour
I start with steel wool and brisk passes until the surface feels smooth. I stop when raised corrosion is gone and the metal feels even under my fingers.
Wash
I rinse with warm water and a little soap to lift particles. Then I wipe the pan fully clean so no grit remains.
Dry
I pat with a paper towel, follow with a dedicated towel, then warm the pan briefly on low stove heat. That last few minutes drives off hidden moisture.how-to-clean-garbage-disposal
Oil
I spread a very thin layer of vegetable oil across the inside and outside. I always wipe away any excess oil so there are no glossy pools or drips left behind.
Oven-season
I preheat the oven to 450–500°F, place foil on the lower rack, and bake the skillet upside down for one hour. This hour at high heat polymerizes the oil into a tough seasoning layer.
Cool
I turn the oven off and let the pan cure as it cools inside. If any areas feel tacky, I add more oven time rather than extra layers of oil. That prevents sticky buildup and builds durable layers that resist wear.
- Inspect: check the surface under good light for even coverage.
- Record: note minutes, oil amount, and stove time so the next session is faster.
Fixes, Tips, and Common Mistakes I Avoid

A reliable finish comes from patient layers and steady oven time, not quick fixes. I watch the final bake as closely as the scrub that came before. Thin coats and full heat cycles give the best results for my pan.how-to-clean-brass
If the seasoning feels sticky or gummy: it usually means too much oil or not enough oven time. I return the pan to the oven at the recommended temperature and give it another hour. I check the surface after it cools and repeat rather than add more oil.
I keep my layers thin and even. I never spot-treat one area with a heavy smear. Instead I re-season the whole pan so the finish stays uniform during cooking.
Quick checklist I follow
- I avoid thick coats; puddles cause tackiness.
- I feel the surface after cooling; tack = more oven time, not more oil.
- I monitor oven heat and total time closely to cure the layers.
- I dry the dish fully before any whisper of oil for storage.
“More time at temp cured my sticky finishes every time.”
| Issue | Cause | My Fix |
|---|---|---|
| Sticky seasoning | Excess oil or short bake | Run another hour in the oven; wipe excess before baking |
| Dull or burnt patches | Uneven layers or old residue | Light scrub, thin layer, repeat bake until sheen returns |
| New rust spots | Trapped moisture at handle or underside | Dry thoroughly, add thin oil, store upright and dry |
My Ongoing Care to Prevent Future Rust

A simple end-of-day routine keeps my pans ready for the next meal. I follow a quick set of tasks that take seconds but save hours of repair later.
After cooking, I rinse with warm water and a touch of soap, then dry the surface with a towel. I set the pan over low heat on the stove for a minute to evaporate hidden droplets. Finally, I wipe on a very thin oil layer so the protective season stays even.how-to-clean-a-cast-iron-skillet
For everyday cleaning I reach for coarse salt when bits cling. Salt acts as a gentle abrasive and avoids stripping a good seasoning. I never soak the cookware or run it through dishwashers. Standing water and harsh cycles are the quickest ways to undo a finish.
Storage and small rituals
- I store pans in a dry spot with airflow and place a paper or towel between stacked pans.
- I inspect rims, handles, and undersides each time because hidden edges collect moisture.
- I keep a small bottle of oil and a towel by the range so the routine is fast and automatic.
- If the surface looks dull after big cooking sessions, I give the pan a short maintenance season.
“Consistent care with water control, thin oil, and smart storage keeps cookware reliable.”
| Habit | Benefit | Quick Tip |
|---|---|---|
| Rinse with warm water and soap | Removes food residue without stripping finish | Use minimal soap and hot tap water |
| Dry and brief low heat | Evaporates hidden moisture | Warm on stove for 60 seconds |
| Thin oil layer before storage | Refreshes seasoning without tack | Wipe excess until barely shiny |
| Salt for quick scrubs | Gentle abrasive for stuck bits | Use a handful and a paper towel rub |
For a full restoration walkthrough, see this remove rust cast guide when deeper work is needed.
Conclusion
A little attention and the right order of steps saves my pans and keeps meals on track.
I follow a dependable flow: scour with steel wool, wash with warm, soapy water, and dry fully with towels and a minute of low stove heat. I wipe on a very thin coat of oil, then bake the pan upside down at 450–500°F for one hour with foil below. Let the pan cool inside the oven so the new surface bonds tight.
Important: metal corrosion is not food safe, so I remove any trace before I preheat the stove or add ingredients. A few extra minutes spent drying prevents hours of rework later.
I use vinegar only when needed, salt for quick tidying, and keep a simple kit—steel, towels, oil, and patience. The same routine works for every skillet and pan I own, and it brings the cookware back to daily use with a durable, smooth finish.how-to-clean-washing-machine


