
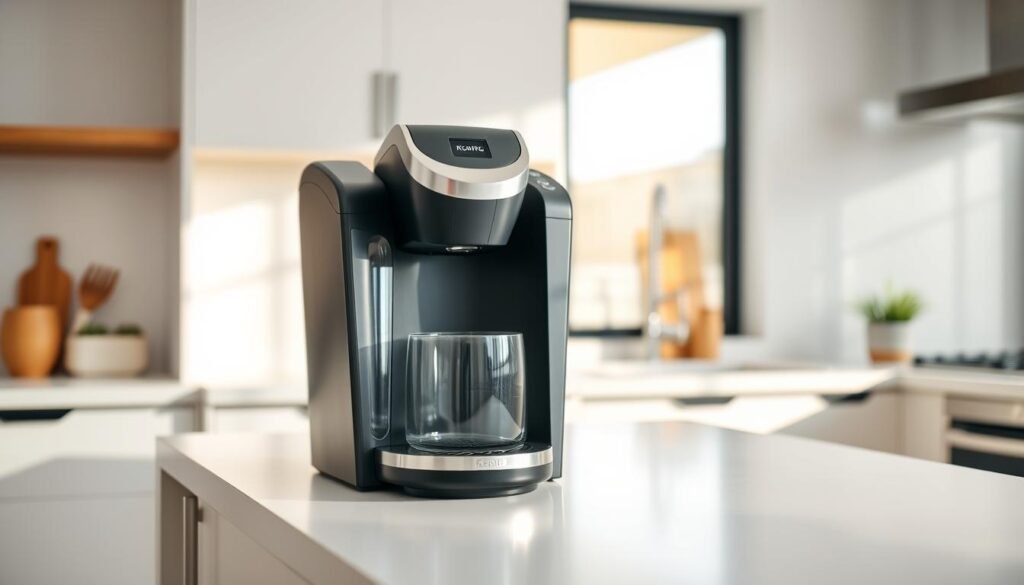
Did you know not cleaning your Keurig can lead to old coffee oils and minerals buildup? This can make your coffee taste bad.
Cleaning your Keurig is essential to keep it working well and lasting longer. Vinegar is a great natural cleaner for removing mineral deposits and old coffee residue.
Using vinegar is easy and saves money. In this article, we’ll show you how to clean your Keurig with vinegar. We’ll also give you tips to keep your coffee maker in great shape.
Key Takeaways
- Regular cleaning is necessary to maintain your Keurig’s performance.
- Vinegar is a natural and effective cleaning agent for your Keurig.
- Cleaning with vinegar can help remove mineral deposits and old coffee oils.
- A clean Keurig ensures a better-tasting coffee.
- Regular maintenance can extend the lifespan of your Keurig.
Why Cleaning Your Keurig is Important
Cleaning your Keurig is more than just keeping it clean. It’s key to making sure it works well and lasts long. The taste of your coffee and how long your Keurig lasts depend on it.
Effects of Mineral Buildup
Mineral buildup is a big problem for Keurig owners. Water in the Keurig has minerals like calcium and magnesium. These can leave deposits over time.
These deposits can clog the water lines and mess with the heating element. This makes the machine less efficient. Cleaning regularly helps get rid of these deposits.
Impact on Coffee Taste
The taste of your coffee is greatly affected by your Keurig’s cleanliness. Mineral buildup and old coffee oils can make your coffee taste bad. Cleaning your Keurig regularly keeps your coffee tasting fresh and rich.
A clean Keurig also makes sure water flows right through the coffee grounds. This leads to a better-tasting cup of coffee.
Maintaining Longevity of Your Machine
Regular cleaning is key to keeping your Keurig in good shape. It removes mineral deposits and old coffee residue. This prevents damage to the machine’s parts.
This not only makes your Keurig last longer but also keeps it working well.
| Benefits of Cleaning | Description |
|---|---|
| Prevents Mineral Buildup | Regular cleaning removes mineral deposits that can cause clogs and affect the machine’s performance. |
| Improves Coffee Taste | Cleaning the Keurig ensures that coffee tastes fresh and rich by removing old coffee oils and mineral deposits. |
| Extends Machine Life | By removing residue and mineral deposits, you can prevent damage to the machine’s internal components, extending its lifespan. |
What You’ll Need to Clean Your Keurig

To clean your Keurig, you’ll need some basic supplies and to know about safety. Having everything ready before you start will make cleaning easier and faster.
Essential Supplies for Cleaning
Here are the supplies you’ll need to clean your Keurig:
- White vinegar: This is the main cleaner that will descale and clean your Keurig.
- Water: You’ll need fresh water to mix with the vinegar and to rinse your Keurig after cleaning.
- A clean cloth or sponge: For wiping down the exterior of the machine.
- A large mug or container: To catch the water and vinegar solution as it runs through the Keurig.
Using the right supplies will ensure your Keurig is well cleaned and maintained.
Safety Precautions
When cleaning your Keurig, it’s important to take safety steps to avoid accidents or damage.
- Unplug your Keurig: Always unplug your Keurig before starting the cleaning process to avoid any electrical accidents.
- Use protective gloves: If you’re sensitive to vinegar or prefer not to get your hands dirty, consider wearing gloves.
- Be cautious with hot parts: Some parts of the Keurig may still be warm or hot; be careful when handling them.
Following these safety precautions will help you clean your Keurig safely and effectively.
Preparing Your Keurig for Cleaning

Before you start cleaning your Keurig, it’s essential to prepare it properly. This ensures a thorough cleaning process.
Unplugging and Removing Components
The first step is to unplug it from the power source. This is a crucial safety precaution to avoid accidents or electrical shocks. Next, remove any removable parts like the water reservoir, drip tray, and K-cup holder.
- Unplug your Keurig
- Remove the water reservoir
- Take out the drip tray and K-cup holder
Emptying the Water Reservoir
Emptying the water reservoir is a vital step. Remove the reservoir and pour out any remaining water. For more detailed instructions, you can refer to this guide on Good Housekeeping.
By following these steps, you’ll be able to clean your Keurig effectively and safely. Always check the manufacturer’s instructions for any specific recommendations.
Making the Vinegar Solution
Before you start cleaning your Keurig, it’s important to mix the right vinegar solution. This step is key to removing mineral deposits and old coffee oils. These can change the taste of your coffee.
Choosing the Right Vinegar
Not all vinegars are the same when it comes to cleaning your Keurig. You should use white distilled vinegar. It’s pure and won’t leave any taste or smell behind. Apple cider vinegar or other types might not work as well and could leave residues.
For more detailed instructions, check out guides like the one on The Kitchn.
Mixing the Solution
To mix the vinegar solution, combine water and white distilled vinegar in a 1:1 ratio. For example, use 4 cups of water and 4 cups of vinegar. This mix is gentle yet effective at removing scale and buildup.
Using the right ratio is crucial to avoid damaging your machine or leaving a strong vinegar taste. Once you’ve mixed the solution, you’re ready to start cleaning.
Starting the Cleaning Process

Now that we have our vinegar solution ready, it’s time to start cleaning. This step is key to remove mineral buildup and old coffee oils. These can change the taste of your coffee.
Adding Vinegar to the Water Reservoir
Pour the vinegar solution into the water reservoir slowly to avoid spills. Fill it to the top with the solution. If you’re not sure about the capacity, check your Keurig’s user manual.
Using the right amount of vinegar solution is crucial. It cleans your Keurig well without leaving harsh chemical residues. For more detailed instructions, visit this guide on cleaning a Keurig with vinegar.
Running the Brew Cycle
After filling the reservoir, place a large mug on the drip tray. Then, run a brew cycle without a K-cup. The machine will circulate the vinegar solution, cleaning out buildup or debris.
The brew cycle may take a few minutes, depending on your Keurig model. Keep running the cycle until the reservoir is empty. You might need to do this several times to use up all the vinegar solution.
| Step | Description | Notes |
|---|---|---|
| 1 | Pour vinegar solution into the reservoir | Fill to maximum capacity |
| 2 | Run a brew cycle without a K-cup | Use a large mug on the drip tray |
| 3 | Repeat until the reservoir is empty | Multiple cycles may be needed |
By following these steps, you’ll clean your Keurig effectively with vinegar. This keeps your machine working well and your coffee tasting great.
Rinsing Your Keurig After Vinegar

After using vinegar to clean your Keurig, it’s key to rinse it well. Proper rinsing makes sure your coffee maker is ready for fresh coffee without vinegar taste.
Filling the Reservoir with Water
Start by filling the water reservoir with fresh water. This step dilutes any vinegar left and gets the machine ready for rinsing. Use cold water, as hot water is not needed for this.
Running Additional Brew Cycles
After filling the reservoir, run several brew cycles to rinse out the vinegar. Aim for at least three to four cycles to remove all vinegar taste. Throw away the water after each cycle, and keep rinsing until the water is clean.
“Rinsing your Keurig is a crucial step that should not be skipped,” says coffee expert, Jane Doe. “It’s the difference between a clean machine and one that still tastes like vinegar.”
“The key to a great cup of coffee is not just the beans, but also the cleanliness of your coffee maker.”
By following these steps, you can make sure your Keurig is well rinsed and ready for its next use. Regular rinsing after vinegar cleaning keeps your coffee tasting fresh and your machine working well.
Cleaning the Keurig Components

After running the vinegar solution, we need to tackle the task of descaling the water reservoir and wiping down the exterior. This step is crucial for maintaining the hygiene and functionality of your Keurig.
Descaling the Water Reservoir
The water reservoir is a breeding ground for mineral deposits and bacteria. To descale it, mix equal parts of water and white vinegar in the reservoir. Let it sit for about 30 minutes to an hour. Then, scrub the reservoir gently with a soft brush to remove any stubborn deposits.
Rinse the reservoir thoroughly with clean water to remove any vinegar taste or smell. This step is essential to prevent any residual vinegar from affecting the taste of your coffee.
Wiping Down the Exterior
The exterior of your Keurig can accumulate dust, splatters, and fingerprints. To clean it, dampen a cloth with water, and add a small amount of mild soap. Wipe down the entire exterior, paying special attention to the buttons and display screen.
For tougher stains or splatters, you can use a mixture of baking soda and water to create a paste. Apply the paste to the stain, let it sit for a few minutes, and then wipe it off with a damp cloth.
- Regularly cleaning your Keurig’s components can improve its performance and longevity.
- Always unplug your Keurig before cleaning to avoid any accidents.
- Use a soft cloth to clean the exterior to prevent scratching the surface.
By following these steps, you can keep your Keurig in top condition and ensure it continues to brew great-tasting coffee.
Tips for Regular Maintenance

To keep your Keurig in top shape, regular maintenance is key. It’s not just about cleaning; it’s about keeping all parts working well. By following simple tips, you can make your Keurig last longer and keep your coffee tasting great.
Frequency of Cleaning
How often to clean your Keurig depends on how much you use it. If you use it every day, clean it every 3-6 months. If you use it less often, cleaning every 6-12 months is enough. Cleaning regularly stops mineral and bacterial buildup, which can harm your coffee’s taste and your machine’s life.
For more detailed cleaning tips, check out Food52. They have step-by-step guides.
Other Cleaning Solutions
Vinegar is a popular choice for cleaning Keurigs, but it’s not the only one. Commercial descaling solutions can also work well. Some people use lemon juice or citric acid as alternatives.
Choose your cleaning solution wisely. Always follow the manufacturer’s instructions and be safe. Regular upkeep keeps your Keurig working right and your coffee tasting great.
Troubleshooting Common Issues
After cleaning your Keurig with vinegar, you might face some problems. It’s important to fix these issues to keep your machine working well.
Vinegar Smell Persists
If vinegar smell stays after cleaning, it’s because vinegar is still in the system. To get rid of this smell, run a few cycles with just water. This will help rinse out the vinegar. You can also try descaling the machine again or wiping it down with a damp cloth.
Tip: If the smell won’t go away, make sure the water reservoir is clean and dry. Sometimes, a dirty or damp reservoir can cause the smell.
Brew Cycle Not Working
If your Keurig’s brew cycle isn’t working after vinegar cleaning, there are a few possible reasons. First, check if the machine is put together right and the water reservoir is in place. Airlocks or scale buildup could also be the problem. Try running a few more brew cycles or gently shaking the machine to fix it.
- Check if the water reservoir is properly aligned and seated.
- Ensure that the K-cup holder is clean and free of debris.
- Run multiple brew cycles to clear out any remaining vinegar or scale.
If the problem still exists, it’s a good idea to look at the user manual or contact Keurig’s customer support for help.
Storing Your Keurig Properly
Keeping your Keurig in the right place is key to its performance and life span. It should be stored to avoid damage and keep it clean.
Importance of Proper Storage
Storing your Keurig right is vital. It stops mineral buildup, cuts down on bacteria, and keeps it working well. As Quoted from Keurig’s official maintenance guide, “Proper storage is key to extending the life of your coffee maker.”
“Proper care and maintenance of your Keurig, including storage, are essential for optimal performance.”
Think about where you’ll store your Keurig. Don’t put it in humid or very cold spots. It can harm the machine’s parts.
Tips for Safe Storage
Here are some tips for safe Keurig storage:
- Unplug the machine to prevent any accidental start-ups.
- Empty the water reservoir to prevent mineral deposits and bacterial growth.
- Clean and dry the exterior to prevent dust accumulation and water spots.
- Store the Keurig in a dry, cool place, away from direct sunlight.
| Storage Condition | Benefit |
|---|---|
| Dry Environment | Prevents mineral buildup and bacterial growth |
| Cool Temperature | Protects machine components from damage |
| Away from Direct Sunlight | Reduces risk of overheating and component degradation |
By following these tips, your Keurig stays in top shape, even when not in use. Remember, proper storage is a big part of keeping your coffee machine healthy.
Alternatives to Using Vinegar
Don’t like vinegar? No worries, there are other ways to clean your Keurig. Vinegar is great for cleaning, but some people don’t like its smell or taste. Luckily, there are other methods to keep your Keurig working well.
Commercial Descaling Solutions
Commercial descaling solutions are a good alternative to vinegar. They’re made to remove mineral buildup from coffee machines, including Keurigs. Make sure the solution is safe for your Keurig to avoid damage. Follow the instructions for the best results. You can find these solutions at stores that sell coffee machines or online.
Using a commercial descaling solution is as effective as vinegar. Some people find it easier because it’s made for coffee machines. For more tips on cleaning your coffee machine without vinegar, check out this guide.
Other Household Remedies
Household items can also clean your Keurig instead of vinegar. Lemon juice or citric acid can descale your machine. Mix equal parts water and lemon juice or follow the product’s instructions for citric acid. Then, run this solution through your Keurig’s brew cycle. These methods can remove mineral deposits and make your machine fresh.
After using any cleaning solution, rinse your Keurig well. This ensures no taste from the cleaning solution gets into your coffee. A few cycles with just water should do the trick.
Final Thoughts on Cleaning Your Keurig
Now that your Keurig is clean, you can enjoy a great cup of coffee every time. Cleaning it with vinegar is easy and effective. It removes mineral buildup and old coffee oils that can change your coffee’s taste.
Enjoying Better-Tasting Coffee
Cleaning your Keurig makes your coffee taste better. When your machine is clean, your coffee tastes more vibrant and true to its original flavor.
Regular cleaning keeps your Keurig working well. It gives you a great cup of coffee every time. A clean Keurig also stops bacteria and contaminants from ruining your coffee’s quality.
Care and Maintenance Overview
To keep your Keurig in top shape, regular care is essential. Here’s a quick guide to keeping your Keurig in great condition:
| Maintenance Task | Frequency | Benefit |
|---|---|---|
| Clean with Vinegar | Every 3-6 months | Removes mineral buildup |
| Descale Water Reservoir | Every 6 months | Prevents lime scale |
| Wipe Down Exterior | Monthly | Keeps machine looking new |
By doing these simple maintenance tasks, your Keurig will keep working well. You’ll enjoy great-tasting coffee for a long time.
Frequently Asked Questions
Keeping your Keurig clean might raise some questions. I’ll cover some common ones to help you enjoy your coffee more.
Cleaning Frequency
Clean your Keurig every 3-6 months, based on how often you use it. If your coffee tastes off, it’s probably time to clean. Regular cleaning stops mineral and bacteria buildup, keeping your coffee fresh.
Alternative Cleaners
Vinegar is a great cleaner, but you can also use other options. Try lemon juice or citric acid. Always check the instructions for any cleaner you pick.
Regular cleaning makes your coffee taste better. If you’re not sure what to do, check your user manual or contact the maker for help.


