
Nearly 7 in 10 heavy desk users notice their mouse feels less precise after a few weeks. I learned this the hard way when my gaming sessions felt sluggish despite flawless hardware.
I keep my pad fresh because it directly affects tracking and performance. Dust, skin oils, and crumbs build up fast and make the surface sticky or uneven.
My routine is fast and safe: a quick weekly wipe for heavy use, a deeper wash when I spot stains, and careful handling for RGB or glass surfaces.
I also make sure electronics stay unplugged and that I dry parts flat and away from heat. That gentle care prevents warping, delamination, and damaged lighting.
Key Takeaways
- Regular upkeep keeps mouse tracking smooth and consistent.
- Dust, dirt, sweat, and oils are the main culprits behind poor glide.
- Match the method to the material: fabric, hard, RGB, or glass.
- Unplug electronics and control moisture to avoid damage.
- A few minutes of care restores feel and extends pad life.
Why I Clean My Mousepad Regularly and What You’ll Need
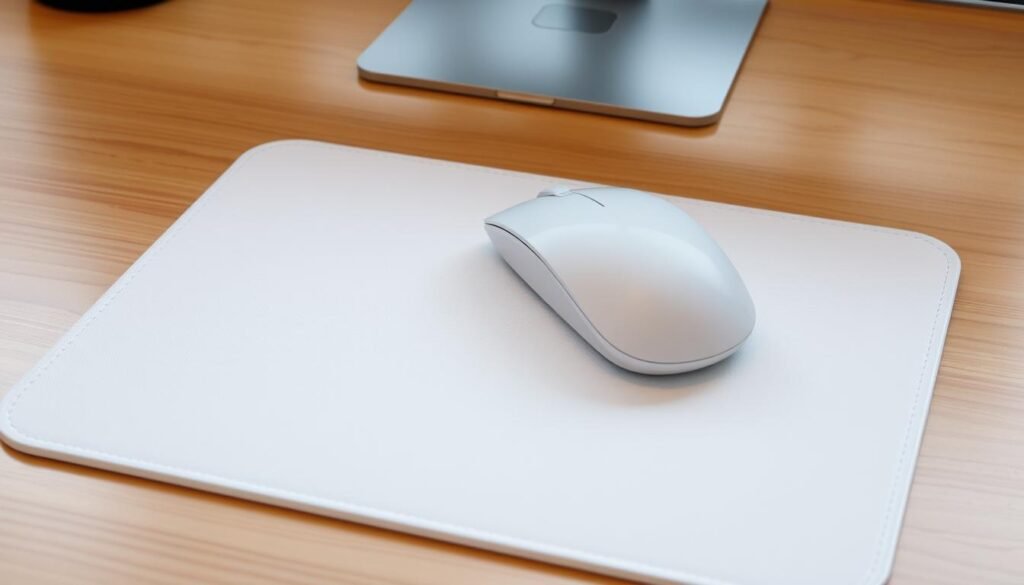
My mouse tracks better when the pad surface is free of oil and grit.
Better tracking, fewer stains, and longer pad life are the main reasons I keep a simple routine. Residue from skin oils, dust, and food crumbs reduces precision and causes tiny skips that add up. I move the pad away from my computer and unplug RGB gear before any work.
My simple kit fits on the sink: a drop of dish soap, a bowl of warm water for washing, cold water for rinsing, a microfiber cloth, a soft brush, and a towel to blot.
- I choose gentle products because harsh chemicals and stiff brushes can damage surfaces.
- I test any cleaner on a hidden corner, especially for printed or leather pads.
- I give myself enough time for full air drying before using the mouse again.
| Item | Purpose | Tip |
|---|---|---|
| Dish soap | Light degreasing | Use one drop per bowl of warm water |
| Microfiber cloth | Gentle wiping | Soft, lint-free for printed surfaces |
| Soft brush | Dislodge debris | Use gentle strokes on fabric tops |
| Towel | Blot excess moisture | Press; do not rub or twist |
For detailed steps and extra tips, I also refer to a trusted guide: clean mousepad instructions.
How to clean mousepad: step-by-step for every material

Each pad type demands a unique approach, and I use short, safe steps for every one.
Cloth and neoprene
I soak the fabric in warm water (under 30°C) with a drop of dish soap. Then I dip a microfiber cloth and gently scrub in circles to lift oils without fraying fibers.
| how-to-clear-the-codes-of-a-check-engine-light/ |
After that I rinse with cold water and press the pad flat to remove excess—never wring. Air dry flat until fully dry.
Plastic, rubber, and hard tops
For rubber or plastic surfaces I use a mild soap solution on a soft cloth and wipe the surface clean. Rinse with cold water and dry with a towel.
Hard plastic or metal can be wiped down; some plain tops go on the top shelf of a gentle dishwasher cycle, then air dry.
Electronics, leather, glass, and gel
Unplug RGB or electronic pads and use a slightly damp cloth only. Never submerge controllers or seams.
Leather needs a dust wipe and a proper leather cleaner with a microfiber cloth; avoid over-wetting. For glass, wipe with a soft cloth and glass cleaner. Gel wrist rests get spot cleaning only; do not immerse.
If you want a full walkthrough, see my detailed guide — step-by-step instructions.
Drying and post-clean care that protect performance

A quick blot and a day of airflow restore feel and prevent damage.
Blot first, then let the pad air flat. I lay the mousepad on a clean towel and press another towel on top to remove excess without twisting the material. This helps remove water trapped in the foam and fabric.how-to-clean-rust-off-metal
Blot to remove excess, then let the mousepad air dry flat
I place the pad on a flat surface so edges stay straight and the surface stays even. Letting it rest flat prevents curls and ripples that can hurt glide.
Speed it up safely: airflow over heat; never dryers or direct sun
I use a fan or open a window to move air across the surface. Avoid radiators, hair dryers, and direct sunlight, which can warp foam, fade prints, or separate layers.
- I check stitched edges and seams for trapped water, since moisture there causes odors and slow dry time.
- If I’m in a hurry, I position a fan to push air across the pad without adding heat.
- Before reuse, I touch the center and corners to confirm everything feels completely dry to the hand.
- As a final step, I wipe the desk area so the dry mousepad returns to a clean, smooth base.
Remember: proper drying keeps tracking accurate and prevents smells. For a step-by-step refresher, see this concise guide: step-by-step instructions.
My easy maintenance routine to keep a cleaner mousepad

A short routine each week keeps my pad ready for long sessions. It only takes a few minutes and avoids heavy scrubs later.
Weekly cleaning: I wipe the surface with a slightly damp cloth and one drop of mild soap. Then I dry it quickly with a soft towel so the pad is ready right away.how-to-clean-leather
Dust, debris, and pet fur
I shake the pad outside to dislodge dust and debris before it settles into the weave. For pet fur, a lint roller works great, or I lightly press packing tape over problem areas.
Include the mouse
I clear lint from the sensor area and remove any trackball if my mouse has one. Compressed air or a paperclip cleans tight spots; then I wipe the exterior with a soft cloth. I never spray liquids into the mouse to avoid damaging internals.
- I clean the back of the pad too—grit there can scratch the desk and reduce grip.
- If I want extra hygiene, I use a surface-safe antibacterial spray sparingly and only when the material allows it.
- Keeping up this weekly routine prevents dirt from turning into stains and cuts down on deep washes.
| Task | Frequency | Quick tip |
|---|---|---|
| Wipe surface with damp cloth | Weekly | One drop of mild soap, then dry |
| Shake out loose dirt | Weekly or after heavy use | Do it outside to avoid indoor mess |
| Remove pet fur | As needed | Use lint roller or packing tape |
| Mouse sensor and exterior | Weekly | Compressed air; avoid spraying inside |
Want a quick refresher? Check my weekly routine guide for an illustrated walkthrough.
Stains, smells, and what not to do

Stains and odors need quick, gentle attention so prints and edges stay intact.
When I spot stains, I use a tiny dab of dish soap or a mild cleaner on a microfiber cloth. I scrub softly and never press hard so the surface or print won’t fray.
After treating a mark, I rinse with cold water and blot to remove excess moisture. This step protects stitched edges and avoids warping in rubber-backed pads.how-to-clean-keurig-with-vinegar
For lingering smells, I wipe the area with a diluted white vinegar solution, let it sit a short moment, then rinse and air-dry. That clears odors without heavy perfumes.
Avoid harsh solvents and abrasive tools. They can strip coatings, fade logos, or ruin seams. I never soak RGB units or gel wrist pieces; I only clean their surfaces and give them enough time to dry.
- I test any cleaner on a hidden spot before using it widely.
- If a stain stays, I repeat gentle soap, water, and blotting rather than escalate to stronger products.
Conclusion
A short routine keeps my setup feeling precise and ready.
, I follow a simple rule: wash fabric pads by hand in warm water with mild soap, rinse with cold water, blot with a towel, and let the pad air dry flat. Hard plastic and metal tops get wiped or a gentle run on the top dishwasher shelf after checking coatings.
Leather and glass need minimal moisture: use a leather cleaner for hides and a soft cloth with glass cleaner for glass. Unplug RGB or electronic pads and only use a damp cloth on their surfaces.
I often clean lightly each week with a microfiber cloth, shake out debris, and refresh the mouse. Patience while the mousepad dry state finishes protects tracking and long-term performance.


